Tuesday, November 30, 2010

Kitchen Reveal

I heard that there is a 2nd annual "Kitchen Reveal" where people post pictures on their blog of their kitchen being hosted by Lake Lure Cottage Kitchen. I'm nosey and love to see how other people live so I think this is pretty cool. Instead of just being a voyeur, I thought I should post some pics of my own little kitchen.

First, I feel like I need to show what the kitchen looked like before we moved in:

That was all the counter space I had. Just out of frame on the left side of the picture was a sliding glass door that took up the entire wall. Oh, and the dishwasher and oven were used by the previous owner as dish and cookware storage. Neither of them were in working order.
This picture is of what was supposed to be an eat in kitchen area. The picture was taken while standing at the sink. You can see a tiny bit of the sliding glass door at the bottom right of the picture.

We have one of the smallest houses in our neighborhood so making the kitchen into a bigger usable space was a bit of a challenge. I really wanted a pantry, but that meant losing the eat in kitchen. We solved that problem by changing the front room, which was supposed to be a family room, into a dining room, and the basement "den" into the family room.

This picture is taken standing in roughly the same spot as the first before picture. We added a little pass through window where the fridge used to be to add a bit more light and so that it is easier to talk to someone in the dining room when you are in the kitchen. Less shouting is a good thing.

We also added the peninsula. This is my second favorite change to this kitchen. It makes cooking with Blockette so much easier. Aside from the peninsula giving me an actual food prep area, Blockette can sit at the end and help mix, eat a snack, draw, do school work, etc. while I'm cooking.

Here's another view from the entry into the kitchen. You can see that the wall where the sliding glass door used to be is where the fridge is now.

This area hardly seems big enough to have held an eat in kitchen. Without the pictures I don't think I would have believed it myself. The pantry is my favorite part of the kitchen. Here's why: Where would I put all this stuff if I didn't have a pantry? The pantry allows me to save money on our grocery bill. I can buy the jumbo package of paper towels and 10 cans of peaches when they go on sale. I've found that little stuff like that really adds up!

So that's my kitchen in a nutshell. It's not the fanciest kitchen ever. There are a few things I would do differently if I had the chance to do it all over again. But the kitchen turned out quite nice considering our limited budget.

Monday, November 29, 2010

Turkey Stock

This was our nummy Thanksgiving turkey. It's been many moons since Mrblocko or I cooked a turkey and we were a bit rusty. We did pretty darn good if I say so myself. We didn't really do anything special. Just rubbed herbed butter over and under the skin and let it sit in some chicken stock as it cooked.

Somehow the turkey got done a full hour than we expected. I hadn't even baked the stuffing yet! It all worked out in the end though. The turkey was cold, but all the side dishes, including the gravy, was hot. Truth be told, ya can't tell if your turkey is hot or cold when it is smothered in molten gravy. We will be eating turkey left overs for some time. This bird is so massive that I cut up the carcass into thirds. I made turkey stock with the first portion and froze the others to make stock later.

I wasn't sure if Turkey stock should have different seasonings than chicken stock so I looked up a few recipes on line. The two recipes I found, from gracious bowl and cooking by the seat of my pants, were almost identical to my go to chicken stock recipe. The only change I made to the chicken stock recipe was to leave out the cloves, add some dried rosemary, and sprigs of fresh sage, thyme and parsley. I only used the fresh stuff because it was still green in my garden.

My plans for this, and the other batches of stock are to make soups with the leftover turkey. I've been on a hunt for some good recipes, and I think I have found a few. We'll see if they pass the taste test!

Sunday, November 28, 2010

Belated Thankful Thursday

It's kind of weird that my thankful Thursday post for the day that you are supposed to be thankful is late. Blame it on the tryptophan. I bought a 17 lb turkey for just the 3 of us so we will be eating turkey for the next 27 years. It was $4, I mean come on! 5 lb roaster chickens aren't even that cheap

Anyhow, aside from the awesome deal on a turkey, I've got so much to be thankful for. I'm so lucky to have a healthy family, a roof over my head and plenty of food in my belly. All that stuff sounds really corny, but after the past few years and this pooptacular economy having those three things makes me feel really blessed.

On a lighter note, I'd like to add one more thing that I'm thankful for: a husband who is willing to help wash the dishes. AMEN!

Wednesday, November 24, 2010

Nutmeg Banana Smoothie

One weekend afternoon I had plunked myself in front of the TV to induce a nap. TV was so boring that I did indeed fall asleep. I awoke to some lady on Everyday Food making a Banana-Nutmeg Smoothie. I'm not the biggest fan of banana's but that sounded really awesome to me.

I went on their website and their recipe is all kinds of messed up. It is missing ingredients and amounts that were different from the show. I happened to have 2 bananas in the freezer so I just used that. A half cup of milk was not enough liquid to process 2 bananas, let alone the 3 that the recipe suggests. I used a full cup and my smoothie was still extra double thick.

This is going to be my go to recipe for using up extra over-ripe bananas. I'd rather have this than banana bread.

Here's what I did:

2 large frozen bananas broken in eighths
3/4 c ice cubes
1 c skim milk
1 single serving size container of light and fit vanilla yogurt
1/4 tsp nutmeg
1/2 tsp cinnamon
2 generous squeezes of Hershey's dark chocolate syrup

Toss all that stuff in a blender and mix it up until it is nice and smooth. Add more milk if you want it thinner.

Tuesday, November 23, 2010

Bratwurst and Potato Soup

Here is the lovely Bratwurst and Potato Soup from Eatin on the Cheap. I made this one night after Blockette's Art class. I knew we wouldn't be getting home until almost 5pm so I did all the chopping and shredding earlier in the day. That way all I had to do was let the soup cook, bubble and simmer away. You can even peel and cut the potatoes up in advance. Just store them in the fridge in a container large enough so the potatoes can be completely covered in water. This way they won't turn any funky colors.

Because the brats I had were Jennie-O Turkey Brats I changed the recipe up a bit. The weight on the package is 19.5 oz, and the original recipe calls for only 12 oz. I mostly just increased all the ingredients so the dish had a more reasonable meat to veggie ratio. Mrblocko said that this was now his new favorite soup. We all liked it, but I wouldn't say it was any better than any other soup I've made.

Bratwurst and Potato Soup adapted from Eatin on the Cheap
1 large sweet onion, chopped
2 large carrots, shredded
3 large potatoes, peeled and diced
3 c chicken stock
1 (19.5 oz) pkg turkey brats
1/2 c frozen corn

Boil the sausages in about an inch of water until you think they are cooked, or at least cooked enough to slice. I hate the skins on turkey brats so I peel them off at this stage. Take the peeled sausage and cut in half lengthwise and then into half moon shapes. Saute in a skillet with a few swirls of olive oil. Let the meat get brown and caramelized. Remove the meat from the pan and brown the onions in the meat drippings. Boil the potatoes in the chicken stock for about 20 min until the potatoes are tender. Blend 3 or 4 ladlefulls of stock and potatoes in a blender and return the mashed mix to the pot to thicken the soup. Add the meat, onions, corn, and carrots and simmer until the soup is heated through.

Monday, November 22, 2010

Insert "Squeee" Here

I got quoted by The Food Librarian on her "I Like Big Bundts 2 Round up."

See her post HERE.

I'm feeling giddy, like I've had some sort of brush with fame. I'm just about as excited as the time when my mom and I were eating at a restaurant and we realized we were sitting behind Pat Morita.

Guess it pays to question someone's sanity. I maintain that Mary the Librarian is crazy in all the right ways. I hope she keeps on in her lack of mental instability, cause I like these month long culinary journies through bundt-ville.

40 Clove Chicken in the CrockPot

I say this with my best friend in mind...don't fear the roaster chicken in the crockpot. You can do it!!!! Bad things will not happen! Yooou Can Dooooo it!

Ok. Seriously, Crock pot chicken with 40 cloves of garlic by Crepes of Wrath is a most awesome roaster chicken recipe. It isn't one of those dump and go recipes, but it is worth the extra effort. Really, all the extra effort is used in pealing 40 cloves of garlic. Even with the little Youtube link that Crepes of Wrath provides that demonstrates how easy it is to peel garlic, 40 cloves is still going to take a bit of time. Again I say it is so worth it.

The only change I made to this recipe was by replacing the white wine with white grape juice. The recipe says you can omit the wine, but I figured since I had the juice I should use it. I wanted to have a bit of liquid in the crockpot to help speed up the cooking.

Speaking of speeding up the cooking, after 3 hours on low my chicken was seriously undercooked. This is probably due to my particular crockpot. I always forget that the low setting on my large oval crockpot is lower than most. I turned up the heat to high and came back an hour and a half later and everything was perfectly cooked. (This is also why there is no photo, we were all so hungry that the chicken was carved up and mutilated before I got around to remembering I wanted to take a picture for this blog entry.)

Even though the chicken got a bit mangled while checking for done-ness, the meat was still exceptionally moist. So much so that Blockette squealed, "OHHH! It's so juicy and tender!" after she took her first bite. Now if you've already checked that link out you might be saying right now, "Well it was probably the gravy that made the meat so tender." Au contraire mon frere. Blockette opted out of the gravy. Yet another point that leads me to believe she is indeed an alien from outer space. I mean Mrblocko and I subscribe to the Homer Simpson theory of drinking eight glasses of gravy a day.

If you are thinking of skipping the gravy step because you are, like me, a lazy person. Get. Yourself. Motivated. Get up off your chair, do not pass go and make the drippings and garlic into some gravy baby. (Not to be confused with gravy made from babies...that's a whole 'nuther post.) This is hands down my favorite gravy ever in the whole history of gravy making. When I was making the gravy and I thought it was done simmering, I tested it for seasoning. As soon as that sweet sauce hit my tongue, my eyes rolled back in my head and I started making all kinds of scary unintelligible noises.

I must have made a fairly big production about it because Blockette came bounding into the kitchen exclaiming, "I wanna try it! I wanna try it!" I looked at her and said, "Really?" She replied, "Yes please Momma!" So I let her have a taste. She agreed that the gravy was quite tasty and then said, "It is good, but I don't want any on my chicken or potatoes OK?" I patted her on her head and assured her she didn't HAVE to have any. Secretly I was doing the happy dance of joy in my head because that meant MORE for ME!

Crock Pot Chicken with 40 Cloves of Garlic from Crepes of Wrath
3 1/2-4 pound fryer chicken (chicken cut into serving pieces)
salt and pepper, to taste
2 tablespoons olive oil
40 cloves of garlic, peeled but still whole (about 3 bulbs of garlic)
3/4 cup white wine (optional, but highly recommended)
1 teaspoon dried thyme
1/2 teaspoon dried rosemary
1 bay leaf
1 tablespoon butter

Spray tcrock pot with non-stick spray. Rub chicken generously with salt and pepper. Place in crock pot. Heat olive oil in a small skillet and add peeled, whole garlic. Cook 5-8 min over med heat til  garlic is golden, then add white wine and stir til liquid has mostly evaporated, 3-5 min over med heat. Pour garlic and white wine over chicken in crock pot, and sprinkle thyme and rosemary over everything. Add in bay leaf. Turn crock pot to low and cook for 3-4 hours. When ready, remove  chicken and place on a separate platter, cover with foil to retain heat. Set aside. Pour juices from pot through a mesh sieve into a pot, press garlic through sieve to form a paste. Cook gravy with T butter over med-high heat til slightly thickened, 5-8 min. Serves 3-4.

Thursday, November 18, 2010

Thankful Thursday 37

1. Medicine that finally is allowing me to breath freely
2. The medicine is working so well I did not need to use that stupid inhaler that makes me shiver and shake for a whole day.
3. Cheap prescriptions at Walmart.
4. Helping out at Blockette's after school art program.
5. Blockette loves that I am the school helper.
6. Mrblocko driving Blockette to school so I could take a long hot shower, and spare Blockette the embarrassment of me driving her to school in my pj's!
7. Blockette loves math.
8. Finishing some Christmas craft projects very early.
9. Mrblocko warning me that the book I was reading (Fat Vampire: A Never Coming of Age Story) had a lame ending so I wasn't disappointed when I finished the book.
10.Waking up after what seemed like you just thought, "Gee, guess I won't be taking a nap today. I'm too awake."

Wednesday, November 17, 2010

Whole Wheat Bread

Witness my first foray into the world of yeasted bread...baked in loaf form. I think it wasn't too shabby for a first attempt. I used the 100% whole wheat sandwich bread recipe from the book Artisan Bread in Five Minutes A Day.

This bread is a no knead type of dough, which is perfect for those of us who aren't swanky enough to own a stand mixer. I made a half batch in case the whole thing ended in disaster.

I was lucky enough to not have a complete disaster, but something didn't quite turn out. Maybe I didn't let the bread rise long enough on the second rise, or my loaf pan was just too big. It was probably a little bit from column A and a little bit from column B.

The dough should have filled slightly more than half the loaf pan. It filled only half. Since the full recipe was for three 1.5 pound loaves, a half recipe should have had more than enough to fill the pan properly. I do know that the yeast was not the culprit. The dough and bread had lots of nice bubbles in it.

The loaf was pretty tasty, especially as cinnamon toast. It didn't grill up well for grilled cheese though. Maybe the middle was too moist and the crust too crisp? Slicing the bread went like a dream. I got nice thin slices, which was nice since the bread was on the dense side due to the lack of rising.

If you'd like to attempt this recipe, see the directions over at Instructables. The directions are rather lengthy so I don't feel like typing them all out. Plus they did such a nice job with pictures and everything.

Here are the ingredients I used to make a half batch of Whole Wheat Bread(page 76 in Artisan Bread in Five Minutes A Day):
3/4 c lukewarm water
3/4 c lukewarm milk
3/4 T granulated yeast
1/2 T plus 1/2t kosher salt
1/4 c honey
2 1/2 c neutral flavored oil
3 1/3 c whole wheat flour

Tuesday, November 16, 2010

Belated Halloween Hot Chocolate

I had every intention of making Good Life Eats' Pumpkin spice white hot chocolate for Halloween this year. Unfortunately, life itself had other ideas. Both Blockette and I were on antibiotics. Bleck. I don't know about how your body reacts to antibiotics, but we get wonky tummies when we drink milk.

Wow was this ever worth the wait! It tasted just like a chocolatey liquidy version of pumpkin pie. Om nom nom! I will definitely make this recipe again.

The original recipe is for 4-6 people so I made a half recipe. This was a perfect size for 2 medium and 1 small mug. The drink is really rich so a smaller cup was OK by all of us. Or... maybe it isn't supposed to be quite as rich. See, I had reserved some white chocolate to make this drink, and then, like a ninny I used it for something else. So I improvised. I had 4 oz of Wonka's Exceptional Chocolate Waterfall (a candy bar that is a combo of milk and white chocolates, ) so I used that. What did I use for the other 2 oz??? Almond bark. Yeah. Weird. I know. But it worked! I told everyone they had to drink the hot chocolate while it was hot so it wouldn't set up in the cup from the almond bark.

I really don't know if this drink would have set up due to the almond bark because we all drank our beverage while it was still hot. Yes. Even Blockette. That's how tasty it was!

Oh, and if you subscribe to my school of thought, this drink was good for you. Dairy, vegetables and antioxidant filled chocolate... can't go wrong with all of that!

Half Recipe of pumpkin white hot chocolate from Good Life Eats
2 c skim milk
6 oz white chocolate (don't use Nestle because their white chocolate chips are waxy and gross)
2 T Cocoa
1/2 tsp vanilla
1/2 c pumpkin puree (not pumpkin pie puree)
1/2 tsp cinnamon
1/4 t nutmeg
1/8 tsp cardamom
a pinch each of allspice and ground ginger

In a sauce pan combine 1 c milk, white chocolate and cocoa. Cook over medium heat, whisking until chocolate has melted and is well combined with the milk. Whisk in the pumpkin and spices. Add in the remaining cup of milk. Heat until nice and warm. If you wanna go all out, top with whipped cream.

Monday, November 15, 2010

Little in the Middle

Happy National Bundt Day 2010! That crazy lady over at The Food Librarian has taken it upon herself to make yet another 30 days of Bundt cakes to celebrate the joyous occasion. Click here to see all her fabulous concoctions for "I Like Big Bundts -2".

Last year I made a Vanilla Halloween Candy Bundt cake for "NBD." We literally had Halloween candy up the bundt. This year Blockette was more interested in having her friend from school come over and play that she came back with a tiny haul. I mean the kid didn't even bring home a single Reese's Peanut Butter Cup. Didn't she know she was supposed to go out until she brought one home for her loving mother??? Kids these days.

So, what did I make to honor the festive occasion this year? While I do like big bundts, (I cannot lie, ) I got a mini bundt pan for Christmas last year and I had not yet gotten around to using it. If you can't break in your bundt pan for "NBD" when can you?

Awww look at that lil cutie. Lil bundt cakes totally rock. There is nothing like sitting down and eating a whole cake all by yourself without the unfortunate side effects of actually consuming an entire full scale cake. It's especially cool when you are five. OK. Yeah. Alright. Who am I kidding? It's just as cool when you are 35.

The Cinnamon tea cakes recipe can be found over at Technicolor Kitchen. This site is great because the author is nice enough to include crazy American measurements on the English version of her Blog. I love not having to convert things from metric, because, like Barbie says, "Math is Hard." No, really it's because I'm lazy. Really lazy.

I would like to clarify that the brown on top of the buntlettes is not because I burned the wee fellas. It is brown sugar and cinnamon. I didn't coat the tops as evenly as I would have liked. I was a bit rushed as all the things I made for dinner last night got done cooking at exactly the same time. While the cakes don't look so spectacular they were pretty tasty in their messy cinnamon and brown sugar attire.

This recipe was the first time I ever had to beat eggs to get them to form stiff peaks. I think I did it right, but how would I know if I did it wrong? The batter was fairly thin by the time I added all the ingredients. The cakes did fluff up and rise nicely. They were also moist and airy. I think if I had screwed up somewhere the bundts would have been akin to bricks.

I thought the cakes tasted a bit eggy. Mrblocko agreed, but didn't notice until I pointed it out. I like eggs so it wasn't a deal breaker for me. If this flavor was a negative for anyone, a drizzle of dulce de leche could hide any eggy elements and no one would be the wiser. I may do just that tonight when I wolf down another cake, not because I didn't like the taste of the cake. I just like dulce de leche and feel guilty eating it by the spoonful.

One more thing...the recipe mentions a cooking time of 35 minutes. That may be a good time for cooking a full size cake, but my mini bundts were done after only 15 minutes.


Cinnamon tea cakes from Technicolor Kitchen
2 eggs, separated
1 cup + 1 ½ tablespoons caster sugar
1 cup milk
2 cups all purpose flour, sifted
2 teaspoons baking powder, sifted
¼ cup  unsalted butter, melted and cooled
1 teaspoon vanilla extract

Cinnamon topping:
2 tablespoons brown sugar
2 teaspoons ground cinnamon
2 tablespoons  unsalted butter, melted

Preheat the oven to 350°F; butter two 6" round cake pans, line the bottoms with baking paper and butter paper*.  Place egg whites in the bowl of an electric mixer and beat until stiff peaks form. Gradually beat in sugar til thick and glossy. Add egg yolks, one at a time, beating well to combine. Gradually add milk then flour, baking powder, butter and vanilla. Beat til smooth. Divide mix between prepared pans and bake 35 min til cooked when tested with a skewer. Turn out onto wire racks.
In a small bowl, mix together the brown sugar and cinnamon. While cakes are still hot, brush with  butter and dust with combined brown sugar and cinnamon.

* I halved the recipe and used four 1-cup (240ml) capacity mini bundt pans; I generously buttered the pans and unmolded the cakes right after taking them out of the oven;

Friday, November 12, 2010

Microwave popcorn

Ok so I don't normally post on Fridays, but I had to pass on this little nugget of goodness. Did you know that you can make popcorn in your microwave? I mean not in those pre packaged bags that cost a bazillion times more than it does to make your own on the stove and smell like weirdness while they are popping.

Well I didn't have a clue. I saw it a while ago on Our Best Bites but only just now tried it. It is rockin awesome!

All you need is a brown paper lunch bag, a piece of scotch tape and 1/4 c popcorn kernels. Stick the popcorn in the bag, tape it shut then nuke away. Mine took 2 minutes to pop. Then I melted about a tablespoon of butter in a small dish in the microwave for 30 seconds, threw the popped popcorn in a bowl and I poured that butter goodness on top with a healthy shake or 12 of salt. mmm!

OK so why would anyone want to make popcorn not on the stove? Well it's hard to make a small amount of popcorn on the stove and we all know that once popcorn is made it must all be eaten or the universe will collapse on itself. This way you have a bit of portion control. Pretty cool eh?

Thursday, November 11, 2010

Thankful Thursday 36

1.Watching a baby chick hatch at the science museum. (Who knew it could be so exciting?!)
2. A nice family outing.
3. Having enough energy to clean the toilet
4. Sleeping mostly through the night
5. My family being understanding about me wanting to experiment in the kitchen.
6. Blockette's good report card.
7. Nice warm autumn days.
8. Realizing we're out of filters for the humidifier BEFORE I need to use them.
9. Blockette being quiet enough for me to take a nap every day this week.
10. Finishing another good book.(I Shall Wear Midnight by Terry Pratchett)

Wednesday, November 10, 2010

Fail Meal

I would like to start of by saying that I didn't shed a single tear with this disaster of a meal. I think I should get a sticker or a medal for that. I don't even think I swore once. Yay for rolling with the punches.

The menu for this meal was balsamic honey glazed carrots, roasted sweet dumpling squash, and apple sausage with gnocci in butter sauce. It sounds like a nice meal doesn't it?

Problem #1: Gnocci

I made the gnocci from scratch using this recipe at Iowa Girl Eats. I had made the gnocci, or soft potato dumplings about two weeks ago. I tested a few by boiling and pan frying up a single serving. They tasted wonderful, but I forgot to snap a pic. I figured, no problem, I'll freeze the rest, as the recipe states, and take a picture for the blog when I make up the leftovers.

So I boiled the frozen gnocci. Once the dumplings floated to the top I carefully scooped them out and placed them gently into a strainer. Then, I emptied the contents of the strainer into a nice hot skillet. Um. That's not supposed to happen. My gnocci had turned into mashed potatoes. All that work. Down. The. Drain. Ugh. I heated the mess up on the skillet so that it got a bit crispy, sort of like a potato pancake. At least it still tasted good. I definitely won't be making gnocci ever again. Maybe I'll buy the premade stuff, but probably not.


Problem #2: Carrots

I've roasted carrots in the oven before. How could I go wrong with Honey Balsamic Roasted Carrots? I found the recipe on Kalyn's Kitchen. The original recipe called for Agave, but I've always thought agave and honey were interchangeable. Maybe that was where the problem lied. Maybe it was because I cooked the squash in the oven at the same time as the carrots and there was too much steam? All I know is the carrots would NOT caramelize. They cooked but refused to brown, even after an hour.

Because the carrots didn't that nice crispy outside, they were somewhat lacking in taste. They were OK, but nothing fabulous. Steamed carrots with Brady Street Cheese Sprinkle, Fines Herbs and butter would have been easier, and tastier. I'll stick with that the next time we are going to have cooked carrots.


Problem #3: Sweet Dumpling Squash

This was the only recipe that turned out how it was supposed to. Check out the recipe from Dreamy Dish.For those of you unfamiliar with the variety of squash called "Sweet dumpling," above is a photo. They are slightly bigger than half an acorn squash, at least the ones at my grocery store. Maybe we have mutant acorn squash?

I had never heard of Sweet Dumpling squash until I saw them at the store. They were on sale a few weeks before Halloween and I thought it would be nice to try one. In the meantime, it made a nice festive fall decoration on the dining room table. Well, at least there was that.

See, I was under the impression that the squash would taste different than an acorn squash. Everything I read about them said they tasted sweeter. I could NOT tell the difference. I don't hate acorn squash, I'm just not the biggest fan ever. I will eat it, but I get tired of it in large doses.

Half of a sweet dumpling squash is supposed to be a serving size. I think Mrblocko and I got sick of it after about half way through our serving, even with all its buttery, syrupy, brown sugary goodness.

I want to repeat that this wasn't bad, it tasted OK. When it comes to squash I still prefer spaghetti squash. I won't be making this dish again. If you are a squash-o-phile go for it. You're gonna love it.

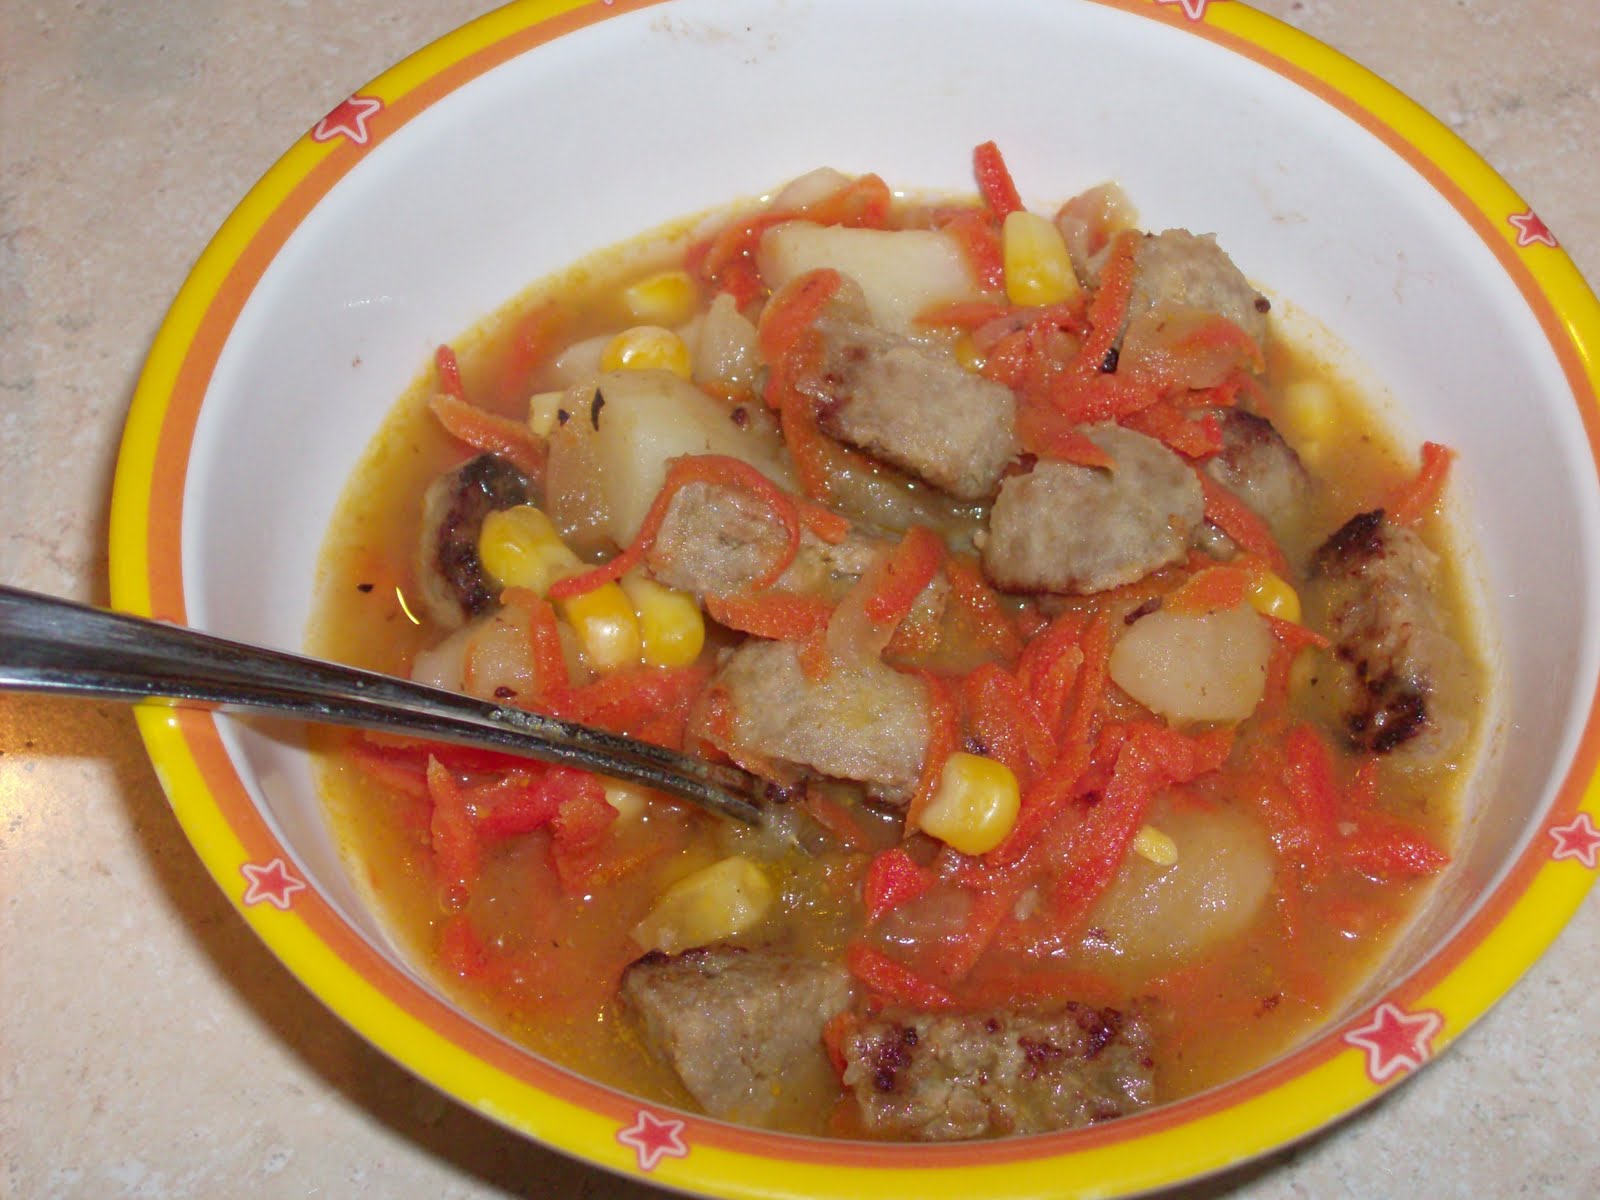
Below is the whole meal all together:I think it looks nice. And, well, at least I didn't burn the sausages.

Gnocci from Iowa Girl Eats
1 pound Russet potatoes
1/2 cup flour, may need more
3 Tablespoons of 1 whisked egg
salt & pepper

ook potatoes until tender and mash until smooth. Whisk eggs and add 3 Tablespoons to the white potatoes. Add seasonings and stir until just combined. add 1/2 cup flour and kneed with your hands until just combined. If dough is too sticky, add a little more. Generously flour a clean, dry surface and knead the dough a couple times until it has come together in a ball. Cut the dough ball into quarters and roll each quarter into a long rope until it’s the width of your index finger. Using a floured knife, cut the rope into one inch sections. Hold a fork, curved side up with one hand and with the thumb of your other hand, gently roll the dough from the top of the curve, to the bottom, keeping your thumb in contact with the dough the whole time. Continue rolling your gnocchi until you’ve gone through the rest of the dough. Transfer to a freezer bag and store in the freezer for 4-6 months.

To cook: Bring a large pot of water to boil. Season water with salt and add gnocchi. Cook until the gnocchi float to the top. Gently drain. In a large skillet, melt butter over medium-high heat. Add garlic and cook, stirring constantly, until light brown, ~30 seconds. Add gnocchi, salt & pepper, and sauté until golden brown.Serve immediately.

Roasted Carrots with Agave-Balsamic Glaze from Kalyn's Kitchen
1 lb. carrots peeled and cut into diagonal pieces the same thickness
1 1/2 T balsamic vinegar
1 1/2 T Agave Nectar
olive oil for spraying roasting pan (or use non-stick spray)
salt and fresh ground black pepper to taste

Preheat oven to 425F. Peel carrots and cut off ends. If carrots are thin, cut into same-size diagonal slices. If carrots have a thicker end, cut off thick part and cut it vertically, then cut into diagonal slices. Carrot slices should be close to the same thickness. Mix balsamic vinegar and agave nectar with a small whisk. Spray flat roasting pan with olive oil or non-stick spray, then arrange carrots in a single layer. Use a pastry brush to brush about 2/3 the agave-balsamic mixture on the carrots.

Roast carrots about 20 minutes, then use a metal turner to turn them and brush with remaining agave-balsamic mixture. Roast ten minutes more, then turn again and check for doneness. Continue to roast until carrots are fork-tender and lightly browned, not quite ten minutes more for me in my toaster oven. Watch them carefully during the final roasting time because they can go from nicely browned to overly done fairly quickly. Grind over desired amount of sea salt and fresh ground black pepper and serve hot.

Sweet Dumpling Squash from dreamy dish
Preheat oven to 350ºF. Cut squash in half, and remove seeds and extra bits with a spoon. Turn upside down, and poke holes in skin with a fork. Turn it back over, and place each half into a baking dish filled with an inch or so of water. In each squash half, put following ingredients, sprinkling spices on top edge, too.

1 tablespoon pure maple syrup
1/2 teaspoon cinnamon
1/8 teaspoon nutmeg
1/2 tablespoon butter
1 teaspoon brown sugar

Bake uncovered or 40-45 min, til tender.

Tuesday, November 9, 2010

Olive and Onion Knots...Now with Omnivore Goodness!

We are soooo not vegans in this house. We're not even quazi-vegetarians. If there ain't meat on the table Mrblocko's brain will implode. Or so he would have me think. Hopefully, I won't offend the nice ladies over at Strawberry Pepper. I totally ruined any vegan-ness in this recipe. I wanted some bread to have with dinner. I didn't have soy milk and egg replacer, but I did have all the other ingredients.

They were really good! They were surprisingly dense. The closest thing I can think of to describe them was a lighter version of a bagel from a chain store like Bruegers, Panera or Einsteins. Were they supposed to be like that? I don't know. Maybe I added too much flour, or kneaded it too much or not enough. I'm still trying to figure out this whole bread thing. Even if I screwed them up they were a tasty tasty side to spaghetti.Blockette did not see me making these rolls. I was a horrible parent and plonked her in front of the TV. I knew if she saw the olives she would make up her mind to hate them before the first crumb hit her tongue. She could smell that I was caramelizing onions so she just assumed the dark spots were "brown onions."

I told her half way through dinner that the black parts were purple olives from Greece called Kalamata Olives. She didn't even care! She was too busy having a heated discussion with Mrblocko whether or not rolls were flowers or knots. I never did figure out who won that debate.

Here is the link to the rolls in their vegan glory: caramelized onion and olive rolls . If you try them with regular eggs and milk let me know what kind of texture your rolls had!

Caramelized Onion and Olive Rolls from Strawberry Pepper 16 Bread Rolls
3/4 cup soy milk, warmed
1 tsp apple cider vinegar
2 1/2 cup flour, in 1 cup and 1 1/2 cup batches (I used half all-purpose, half whole wheat pastry flour)
1 tbsp sugar
1/2 tsp salt
2 1/4 tsp yeast
1 egg replacer, I used Ener-G brand (1 1/2 tsp + 2 tbsp water)
2 tbsp olive oil
1/2 cup kalamata olives, pitted and chopped
1/2 cup caramelized onion (1 large yellow onion)
olive oil for brushing rolls

Drop t vinegar into warmed milk, let sit for 5-7 min. Mix 1 c flour with sugar, salt, and yeast. Stir in warmed curdled milk, prepared egg replacer, and olive oil. Beat til smooth. Set aside somewhere warm for 20 min to rise. Mix in remaining flour, olives, and caramelized onions. Turn onto a clean floured surface, and knead til smooth and elastic, 5-10 min. Add more flour to surface as necessary while kneading. Divide in 16 equal pieces. Tip: divide in half, then each half in half, and so on until there are 16 pieces. Cover pieces before shaping so they don’t dry out. Shape dough: Roll into a thin log, 10-12″ long. Tie in a knot with long ends. Wrap one of the ends underneath. Wrap other end over. Set on a greased baking sheet, and cover while shaping the rest of the rolls. Preheat oven to 375 ºF. Meanwhile, let bread rise for 15-20 min, til doubled in size. Brush tops with olive oil. Bake at 375 ºF for 15-20 min, til golden brown.

Monday, November 8, 2010

Pumpkin Pie Oatmeal

What can I say about microwave pumpkin pie oatmeal from the Craving Chronicles?? If you love pumpkin pie, you'll love this breakfasty version.

Mrblocko and Blockette liked it a lot, but they said that they wouldn't want to eat it every day. I thought the oatmeal could use more sugar, but "more sugar" and "morning" are not a good combination for me. I think I'm just used to the over sweetened pre-packaged Quaker version of oatmeal.

I won't be making this again for myself, but I will make it for the two other weirdos that live in this house. (And no Mrblocko, I'm not referring to the cats.)

Pumpkin Pie Oatmeal from Craving Chronicles Makes 1 serving
1/3 cup oats
2 tablespoons canned pumpkin puree
1 tablespoons packed brown sugar
1/4 cup water
2 tablespoons milk
1/8 teaspoon vanilla extract
pinch of salt
dash of cinnamon, cloves, and allspice
dried cranberries (optional)
chopped pecans (optional)

Measure all of the ingredients into a microwave-safe bowl and stir just until combined. Microwave on high for 1-2 minutes, or until desired consistency. Top with more pecans and dried cranberries, if desired. Serve immediately.

Thursday, November 4, 2010

Thankful Thursday 35

1. It's November (how did that happen?)
2. I don't have pneumonia.
3. After 2 months of being sick, I am finally starting to feel better.
4. I finished reading 2 books this week! (Dust and Zombies vs. Unicorns)
5. I only got sick from the antibiotic once (must be some sort of new record.)
6. Blockette only has a cold and not pneumonia, bronchitis, strep, ear infection, etc.
7. A good family meeting about how we need to act when we are angry.
8. Elections are over and I won't be pestered with phone calls and attack ads.
9. Mrblocko recovered in his usual record time from his cold.
10. Finishing the cross stitch ornaments for church with time to spare.
11. Actually sleeping at night and not laying in bed/the couch wishing I was asleep.

Wednesday, November 3, 2010

Applesauce a la Slow Cooker

After making the Dulce de leche apple pie, I was wondering what I was going to do with the rest of the apples. I'd never made applesauce before and I heard it was easy to do in the crockpot. I did a search for slow cooker applesauce recipes and found ones I liked at year of slow cooking and Frugal Girls. I copied the bits I liked from each recipe and adjusted the amounts to fit our taste preferences and the amount of apples I had on hand.

I have to remember to include Blockette more in the kitchen. Lately she has been begging me to "teach her how to cook." Often, I exclude her because I'm in a rush, or the food prep is all chopping with knives sharp enough chop off all or part of your finger, or all done over the stove. Right now she is still to short to do any stove top work, and I don't feel comfortable having her stand on a stool in front of an open flame. That just screams fire hazard to me.

This recipe was a perfect way to put her to use as my mini sous chief. While I peeled and cored the apples, she cut them. She was very excited because I let her use a "sharp" steak knife. I'd forgotten how great the kitchen was for teaching math. Cutting the apples gave me the chance to talk to her about the difference between halves, thirds and fourths. It must have made a big enough impression because it was all she could talk about to Mrblocko at breakfast the next morning.I'm not sure why this applesauce turned out so RED! Maybe it was the cinnamon? The type of apples or a combination of the two? Either way it was a fun change from the pale yellow version we get from the store. Will I be making this recipe again? Yes, yes yes, a thousand times yes. Not only was it a great way to use up extra apples, but it made the whole house smell like apple pie for several days!

Crockpot Cinnamon applesauce
8 med apples
1/2 c water
up to 1T cinnamon (use 1 tsp if you are not a cinnamon freak like us)
1 t vanilla
1T Br sugar
2T lemon juice

Peel, core and chop your apples. Dump everything in the crockpot. Cook for 4 hrs on high. The apples should mash easily with a fork when they are done. So when they are done, get to mashing. I got 3 generous cups of sauce, but yours may vary depending on the size and type of apples you use. I've heard this freezes well, but I didn't make enough to need to freeze it.

Tuesday, November 2, 2010

My 1st totally from scratch pie

We had planned to visit an Apple Orchard in October as a reward for Blockette's extra good behavior. Sadly, the Apple season ended early this year and we missed out. I told Blockette that I would make her a pie and she could pick out the apples at the grocery store. Luckily, she took the disappointment well, and said that it sounded like fun. (OK, so I told her we were also going to her favorite restaurant, Noodles and Company, for dinner. That was what she probably thought sounded fun.)

I let Mrblocko pick out the apple pie recipe from my huge binder of "to do" recipes. He chose Recipe Girl's Deep Dish Dulce De Leche Pie. This recipe did not include directions on how to make a crust so I went on the hunt for that as well. I settled on Sylvia's Perfect Crust from Tasty Kitchen.

Out of all the possible pie crust recipes in the world, why did I choose this one? Well, I tried a butter crust back in December when I made Pies in a Jar for my uncle for Christmas. The crust was a bit sticky and hard to work with, but I didn't know if that was because I was trying to stick them in tiny jars. I also chose this recipe because it didn't require any butter. I had enough butter to make the pie, but then I wouldn't have any left for the other things I wanted to make later in the week. Butter was about $3 at the store and I refuse to pay this much. I'd rather just stock up when it goes on sale. Did you know butter on sale tastes better? Yup, it's a scientific fact!

The reviews for this pie crust were spot on. Not only was this a very simple crust to prepare, but it resulted in a tender, flaky crust. This was all fine and good, but well, it just didn't have the rich flavorful taste that a butter crust has. It was fine for the Dulce De Leche pie because it was so sweet. The flavors in the pie completely overwhelmed the crust. In fact, had to eat some of the crust by itself so I could actually taste it. Even though the crust was not the best tasting crust on the planet, I would absolutely recommend Sylvia's Perfect Crust to a new baker. The lack of fighting with the crust makes up for any lack of taste. I will keep searching for my ideal tasting crust, but keep this recipe in my arsenal when I want a no fuss pie crust.What about the pie as a whole? It was delicious. I warned Mrblocko before we cut into the pie that this was my first pie that I made 100% from scratch so he shouldn't have too high of an expectation. I told him I even made the Dulce de Leche myself in the crockpot. Do you know what the man said, "Well did you milk the cow yourself too?" Don't worry I smacked him upside the head good for his SASSY mouth.

As for the recipe for Deep Dish Dulce De Leche Pie, I thought it was very straight forward. It was supposed to be a deep dish pie, but it seemed to have enough filling for a regular pie. I think if it was a deep dish pie it would be skimpy on the apples. Or maybe the cups of apple are supposed to be heaping? The only change I made to the recipe was to bump up the cinnamon to 1 tsp.

For some reason the top didn't get as dark as I would have liked. At one point I did put foil on the top of the pie as the recipe states. I was fearful that I would burn the crust. I wish I had kept it off to get a slightly deeper tan. The crust was crispy enough for my liking so it was just an aesthetic thing.

One thing to remember about this pie, as with most pies, you absolutely need to let the pie cool before you slice it. Cooling lets the pie set up. I once had a disaster of a pie that was like soup, partially because I cut it while it was hot. The pie was still slightly warmer than room temp when we cut into it. We just couldn't wait any longer! It was just set enough for it to come out in a complete slice. The pie was even better the next day when it had sit in the fridge overnight. I am totally not ashamed to say that I had a nice hearty wedge for second breakfast!


Deep Dish Dulce de Leche Apple Pie from Recipe Girl
1/2 cup brown sugar
1/3 cup granulated sugar
1/3 cup cornstarch
1/4 teaspoon cinnamon
1/4 teaspoon freshly grated nutmeg
pinch of salt
7 to 8 cups of peeled, sliced apples (I like Granny Smith & Braeburn)
1/2 cup dulce de leche (canned or homemade)
2 Tablespoons apple cider
1/2 teaspoon vanilla extract
double crust for 9-inch pie (purchased or homemade)
egg white mixed with 1 teaspoon of water
coarse sugar for top, optional

Preheat oven to 400F. In a small bowl, mix sugars, cornstarch, spices and salt. In a large bowl, toss apples, dulce de leche, apple cider and vanilla . Add dry ingredients and toss to combine. Between waxed paper, roll out pie dough as large as possible keeping it a good thickness. Line deep dish pie pan with crust and let it hang over sides. Brush with egg white mix. Add filling and spread out evenly.
Roll out 2nd crust a little bit too, place on top of pie. Crimp edges to seal. Brush with egg white mixture. Cut a few holes in top crust for venting. Sprinkle with coarse sugar, if using. Bake for 30 min. Then turn the temperature down to 375F. If pie is browning, cover with foil and top with a pie-crust-shield to prevent crust edges from burning. If you don’t have a pie shield, just cover the whole thing with foil. Bake for another 30 min. Remove pie from oven and cool on rack for several hours to allow filling to set.

*If wish to convert to regular-sized pie (not a deep dish), reduce apples to 5 c and use slightly less dulce de leche.

Sylvia's Perfect Pie Crust from Tasty Kitchen
1-½ cup Crisco (vegetable Shortening)
3 cups All-purpose Flour
1 whole Egg
5 Tablespoons Cold Water
1 Tablespoon White Vinegar
1 teaspoon Salt

In a large bowl, with a pastry cutter, gradually work the Crisco into the flour for about 3 or 4 min til resembles coarse meal. In small bowl, beat egg with fork and pour it into flour/shortening mix. Add 5 T cold water, 1 T white vinegar and 1 t salt. Stir gently til all ingredients incorporated.

Separate dough into 3rda. Form 3 evenly sized balls of dough and place each dough into a large Ziploc bag. Using a rolling pin, slightly flatten each ball of dough (about ½" thick) to make rolling easier later. Seal bags and place in freezer til needed. (If using immediately still a good idea to put in freezer 15-20 min to chill.)

When ready to use dough to make crust, remove from freezer and allow to thaw for 15 min. On floured surface roll dough, starting at center and working your way out. (Sprinkle some flour over top of dough if it’s a bit too moist.) If the dough is sticking to countertop use a metal spatula and carefully scrape it up and flip it over and continue rolling until it’s about ½" larger in diameter than pie pan.

With a spatula, lift dough carefully from surface of counter into pie pan. Gently press dough against corner of pan. Go around pie pan pinching and tucking dough to make a clean edge.

Monday, November 1, 2010

Project # 15 and #16: Xmas ornaments

Our church is having an auction and the Sunday school classes are all putting together themed baskets to enter into the auction. Blockette's class theme is Christmas. I decided to make 2 cross stitched ornaments. The patterns came from the 2010 Just Cross Stitch Ornament issue.

They were very fun to stitch up. The stitching part is always fun for me, but the making into ornament part I always hate. Which is why I only made 2. That's all I could stand to get done with a deadline.

I chose to make them both blue and white because apparently Blue is the color for Advent in the Protestant Church. The bottom ornament was originally supposed to be stitched in red on white fabric. I'm thinking it was intended to be a poinsettia. Which if that is the case then the white works as well because there are white poinsettias too. Sometimes I think it looks like a snowflake and others like a cross. What do you think it looks like?