I found this tutorial for Baby Groot on Twinkie Chan around Christmas. Amid the holiday hubbub, I stitched him up. His little wee arms are pose-able! Just in case I want to make him dance!
He now lives on the shelf above my computer. Every time I look at him he makes me smile. Dance baby Groot, Dance!
Showing posts with label crochet. Show all posts
Thursday, March 5, 2015
Wednesday, May 14, 2014
Luna's Scarf
Yup. That's me.
Naturally, when I saw a pattern, on craftster, for the scarf that Luna wears in "Order of the Phoenix" I went completely gaga. I went out the next day in search of the perfect yarn.
Well, I couldn't find the perfect yarn so I settled on Bernat Softee Baby in the Flannel color. This yarn is classified as a light or 3. Even though the yarn is thinner than the suggested yarn I thought my scarf was getting too wide compared to the one Luna wore. I omitted one of the center most rows. I still think this scarf is too wide in comparison to the original.
You can see my scarf is as wide as Luna's, even with the missing row.
Here's a closeup of the missing ladder type row. If you look carefully at the picture of Luna you can see her scarf has two of these rows.If I could have found it, I think a sock weight, or even a finger weight yarn, and a smaller hook would have replicated the scarf better. Alas, I could not find anything that was not made of wool in a grey I liked.
All things aside, I love how this scarf turned out. It's a really soft and comfy fashion scarf for spring and winter.
Head to Craftster for the wonderful pattern. The creator of the pattern has written instructions and a chart which are super easy to follow.
Monday, May 12, 2014
How I survivied the winter
Leg warmers.
Yes! Leg warmers!
This pattern is from Cobbler's Cabin. I used Claret Red Heart Super Saver Yarn with an H hook for the main part of the leg warmer, and switched to an F hook for the upper and lower ribbing. I made one legwarmer using just an H hook and the ribbing was much too loose to stay on my legs, even over jeans.
I followed the pattern as is, and as you can see by the below picture they are as long as my short stumpy legs. I'm only 5'2" so if you aren't a shorty short pants like me, they will be much longer on you.
These babies are super warm. After that first sub zero stretch we had at the beginning of the winter, I knew we were in for some freakishly frigid weather. Even though I was wearing 2 pairs of long underwear, jeans, and a pair of my husbands fleece pajama pants under my full length down coat, my legs were still really cold after 5 min of outdoor exposure. This extra layer was so warm, it made being outside bearable for just a bit longer.
As it got warmer, and more like a normal winter, I opted to wear the legwarmers instead of long underwear. It just made getting dressed for work so much easier. For me, the legwarmers were as warm as 2 layers of silk long underwear pants.
I luv my legwarmers!
Yes! Leg warmers!
This pattern is from Cobbler's Cabin. I used Claret Red Heart Super Saver Yarn with an H hook for the main part of the leg warmer, and switched to an F hook for the upper and lower ribbing. I made one legwarmer using just an H hook and the ribbing was much too loose to stay on my legs, even over jeans.
I followed the pattern as is, and as you can see by the below picture they are as long as my short stumpy legs. I'm only 5'2" so if you aren't a shorty short pants like me, they will be much longer on you.
These babies are super warm. After that first sub zero stretch we had at the beginning of the winter, I knew we were in for some freakishly frigid weather. Even though I was wearing 2 pairs of long underwear, jeans, and a pair of my husbands fleece pajama pants under my full length down coat, my legs were still really cold after 5 min of outdoor exposure. This extra layer was so warm, it made being outside bearable for just a bit longer.
As it got warmer, and more like a normal winter, I opted to wear the legwarmers instead of long underwear. It just made getting dressed for work so much easier. For me, the legwarmers were as warm as 2 layers of silk long underwear pants.
I luv my legwarmers!
Friday, April 25, 2014
The power of BACON!
I saw this pattern for a crochet bacon scarf at Drunken Aunt Wendy and knew that I had to make it for my baconophile husband.
He went totally gaga for it.
I mean how could he not? It looks like a piece of bacon just sitting there, waiting to be eaten.
This scarf was really fun to crochet. All the lumps and bumps make it a great project for a beginner. If you make a mistake who is going to know? Can't keep your tension even? Perfect...the more irregular, the better the end result looks!
After a few weeks of wearing the scarf Mrblocko commented on how he couldn't get the scarf to keep from twisting up. I told him that's how the scarf was supposed to be. When you cook bacon it twists and curls in lumps and bumps. I'm sure that if I blocked the scarf it would eliminate some of that, but I feel it would make the scarf look less realistic.
He went totally gaga for it.
I mean how could he not? It looks like a piece of bacon just sitting there, waiting to be eaten.
| "Mom! Why does this bacon taste fuzzy?" |
No Blockette! It's not for eating!!!
This scarf was really fun to crochet. All the lumps and bumps make it a great project for a beginner. If you make a mistake who is going to know? Can't keep your tension even? Perfect...the more irregular, the better the end result looks!
After a few weeks of wearing the scarf Mrblocko commented on how he couldn't get the scarf to keep from twisting up. I told him that's how the scarf was supposed to be. When you cook bacon it twists and curls in lumps and bumps. I'm sure that if I blocked the scarf it would eliminate some of that, but I feel it would make the scarf look less realistic.
Friday, February 14, 2014
A really old Crochet Finish
I think I made this shawl sometime over the summer of 2013. It's another prayer shawl for church.
I used nearly 2 skeins of Blue Mint Caron Simply Soft, and a partial skein of Oceana Caron Simply Soft. I really love making shawls from this yarn. They turn out so soft and comfy. Blockette wants to keep every single one I make.
You can find the pattern for this shawl on ravelry or here.
The cool thing about this shawl is it's funky partial hexagon shape.
This is a shawl you can really get bundled and wrapped up in.
The church seems to have a plethora of shawls these days so I think I'm going to call it quits on crocheting prayer shawls for the time being.
Hope you find a good home and give lots of hugs to your owner little hexy blue shawl! Happy travels.
I used nearly 2 skeins of Blue Mint Caron Simply Soft, and a partial skein of Oceana Caron Simply Soft. I really love making shawls from this yarn. They turn out so soft and comfy. Blockette wants to keep every single one I make.
You can find the pattern for this shawl on ravelry or here.
The cool thing about this shawl is it's funky partial hexagon shape.
This is a shawl you can really get bundled and wrapped up in.
The church seems to have a plethora of shawls these days so I think I'm going to call it quits on crocheting prayer shawls for the time being.
Hope you find a good home and give lots of hugs to your owner little hexy blue shawl! Happy travels.
Wednesday, January 15, 2014
Ear Flap Hats
In November I made Mrblocko and myself some crochet hats with ear flaps. I used this pattern from Repeat Crafter Me. Obviously I omitted the step to make them into puppy dogs. Although, I added a Mohawk to mine using this as a guide.
The hats were quite large using the adult pattern. This wound up being exactly what I wanted though. Mrblocko has a larger than average head, and I planned to use mine over another hat for extra warmth while standing outside at work.
With the hats working out to be larger, I thought the ear flaps were a bit too small. I added a few stitches to each row so they didn't look disproportionally small.
I think the mohawk makes it look a bit like a Roman helmet. Maybe I will make another one that is grey with a red mohawk at some point in the future.
Mrblocko got a matching scarf as well. Originally he wanted a solid grey scarf, but as he wanted this as a hat and scarf to wear while running, I thought he should stand out a bit from the pavement. Blockette picked the neon green, but only after I vetoed the neon pink.
The hats were quite large using the adult pattern. This wound up being exactly what I wanted though. Mrblocko has a larger than average head, and I planned to use mine over another hat for extra warmth while standing outside at work.
With the hats working out to be larger, I thought the ear flaps were a bit too small. I added a few stitches to each row so they didn't look disproportionally small.
I think the mohawk makes it look a bit like a Roman helmet. Maybe I will make another one that is grey with a red mohawk at some point in the future.
Mrblocko got a matching scarf as well. Originally he wanted a solid grey scarf, but as he wanted this as a hat and scarf to wear while running, I thought he should stand out a bit from the pavement. Blockette picked the neon green, but only after I vetoed the neon pink.
Friday, June 7, 2013
Purple Shawl
Here's another shawl! This one I sort of just made up as I went along using rows of double crochet and double crochet chain one. Once you make a few triangle shaped shawls they all sort of follow the same formula.
I thought that I'd be good with just 2 skeins of yarn. Nope. I needed 3 and a half to finish the shawl like I wanted to. Of course they didn't carry Purple Haze at Michaels so I had to make the haul to Joann Fabrics where I bought the original 2 skeins. I got the last one in the store in the dye lot I needed. What luck!
I just love how soft and fuzzy this shawl turned out! It's maybe not the best shawl for the summer, but come November someone is going to enjoy cuddling up in it.
I used Lion Brand Homespun in Purple Haze with a "L" hook.
Blockette picked the yarn out. She has such good taste in yarn. Well, most of the time. Her first choice is always neon pink but I think that's just a 7yr old thing.
I thought that I'd be good with just 2 skeins of yarn. Nope. I needed 3 and a half to finish the shawl like I wanted to. Of course they didn't carry Purple Haze at Michaels so I had to make the haul to Joann Fabrics where I bought the original 2 skeins. I got the last one in the store in the dye lot I needed. What luck!
I just love how soft and fuzzy this shawl turned out! It's maybe not the best shawl for the summer, but come November someone is going to enjoy cuddling up in it.
Wednesday, May 22, 2013
Dusty Rose Colored Shawl
I hope you aren't sick of shawls. They are like potato chips to me lately. I can't seem to stop!
This shawl is the Iris Shawl pattern that I found on Ravelry. I used Caron Simply soft for this shawl too. It is so smooth and easy to crochet with. I used about 1 and a half skeins of Rose yarn and about 3/4 skein of off white.
The shawl was designed to be made with a fingering weight yarn, but I wanted it to be larger and have a bit more substance to it. Although, personally, I think I'd like this shawl better if it was light and airy. However, this shawl is not for me, so it's a moot point! I'm confident that it will find the perfect person.
Because I used a thicker yarn, I bumped up the hook size from an F to an I.
As you can see, this is a huge shawl. The point goes past Blockette's knees! Sometimes when I make these shawls I worry that I am making them too big, then I remember that not everyone is short like me and they might want that extra length!
This shawl is the Iris Shawl pattern that I found on Ravelry. I used Caron Simply soft for this shawl too. It is so smooth and easy to crochet with. I used about 1 and a half skeins of Rose yarn and about 3/4 skein of off white.
The shawl was designed to be made with a fingering weight yarn, but I wanted it to be larger and have a bit more substance to it. Although, personally, I think I'd like this shawl better if it was light and airy. However, this shawl is not for me, so it's a moot point! I'm confident that it will find the perfect person.
Because I used a thicker yarn, I bumped up the hook size from an F to an I.
As you can see, this is a huge shawl. The point goes past Blockette's knees! Sometimes when I make these shawls I worry that I am making them too big, then I remember that not everyone is short like me and they might want that extra length!
Wednesday, May 8, 2013
Red Shawl and Blocking
Yes, another shawl for church. I found this pattern for free over on Ravelry. It was originally called Cheche a la Sauce, which is French for something or another. I have no idea. I tried to do a google translate and it came up with Fez sauce. Okaaay.
I thought the chart was confusing for the directions at the beginning of the row. I just winged it and made it so each row had the same amount of stitches or spaces.
The pattern is quite vague on how many rows to make the first motif. I wanted this shawl to be on the large side, so the first motif has 24 rows.
The yarn I used was nearly 2 skeins of Autumn Red by Caron Simply soft. I used a H hook.
I was running quite low on yarn so I made the final motif with only 3 picots and 4 triple crochet instead of 6 picots and 7 triple crochet.
When I finished the shawl I realized that I was going to have to block the shawl to get the final motif to look right.
Blocking is when you wet your knit or crochet item and pin it down so it will retain its shape when it drys.
The above picture shows unblocked parts on the left. See how smooshed looking they are? I like how open and lacy they looked once they were pinned to the towel lined bed.
I was amazed how different the finished product looked once it had dried. The whole thing was much larger too.
The whole thing goes almost to Blockette's knees!
I just love the rich vibrant red. Blockette chose the color for this shawl. She sure chose wisely. Hopefully it will put a smile on someone's face.
I thought the chart was confusing for the directions at the beginning of the row. I just winged it and made it so each row had the same amount of stitches or spaces.
The pattern is quite vague on how many rows to make the first motif. I wanted this shawl to be on the large side, so the first motif has 24 rows.
The yarn I used was nearly 2 skeins of Autumn Red by Caron Simply soft. I used a H hook.
I was running quite low on yarn so I made the final motif with only 3 picots and 4 triple crochet instead of 6 picots and 7 triple crochet.
When I finished the shawl I realized that I was going to have to block the shawl to get the final motif to look right.
Blocking is when you wet your knit or crochet item and pin it down so it will retain its shape when it drys.
The above picture shows unblocked parts on the left. See how smooshed looking they are? I like how open and lacy they looked once they were pinned to the towel lined bed.
I was amazed how different the finished product looked once it had dried. The whole thing was much larger too.
The whole thing goes almost to Blockette's knees!
I just love the rich vibrant red. Blockette chose the color for this shawl. She sure chose wisely. Hopefully it will put a smile on someone's face.
Monday, April 15, 2013
Lacey Edge Crochet Shawl
I made this shawl for the prayer shawl group that just started up at my church.
The pattern was a simple one called: " Cozy Shawl" from Engineered Crochet.
The main body of this shawl is done in the stitch called extended single crochet. I had no idea what that was. When I read the printed directions online I thought it was just like a half double crochet. So, I found myself a video of the stitch in progress where I discovered they are nothing alike. The video that was helpful to me was from CrochetNCrafts and can be found here.
I used nearly 2 skeins of Caron Simply Soft in Berry Blue.
I really like how this yarn drapes in this shawl. There are a few more patterns I want to try out, but if they turn out funky I'll make another one of this pattern in a different color of simply soft.
Apparently Blockette thinks it's super cozy. Hopefully it's new owner will too.
Wednesday, April 3, 2013
Fake Entrelac Scarf
I made this scarf to challenge myself with a new technique. It uses a crochet technique called Tunisian Crochet. This stitch is sort of like a hybrid of crochet and knitting. Since I'm a hopeless case at knitting, I thought, maybe if I could figure out how to do this type of crochet, it would make learning how to knit a bit easier.
While I haven't yet attempted to teach myself to knit, I found this new stitch quite easy to learn. There is this awesome video I watched that was created by Crochet Geek that I found invaluable. I watched it over and over, and with many stops and starts, stitched along with the video. Eventually, I was able to crochet the pattern away from the computer, and even stitch it while simultaneously watching TV! Once I figured out the rhythm, it was a piece of cake.
I wished this pattern looked a bit more like the knitting entrelac stitch. While it is similar, it's not exactly the same. With knitting, the direction of the yarn alternates with each diamond row. With the Tunisian crochet the stitch direction stays the same. I'm sure there is a way to change this, but I'm not advanced enough to figure it out.
This pattern yields a dense fabric. I think if I was going to make another scarf with this stitch, I'd use a sock weight yarn instead of a worsted weight/4. The scarf would have a much better drape. As it is, it sort of stands up around your face. It's definitely a scarf for wearing on a super cold day, and not a fashion accessory style scarf like the others I've made.
The yarn I used for this scarf was 100% acrylic Loops and Threads Impeccable in: Amethyst, Kelly Green and Ginseng, purchased at Michael's.
While I haven't yet attempted to teach myself to knit, I found this new stitch quite easy to learn. There is this awesome video I watched that was created by Crochet Geek that I found invaluable. I watched it over and over, and with many stops and starts, stitched along with the video. Eventually, I was able to crochet the pattern away from the computer, and even stitch it while simultaneously watching TV! Once I figured out the rhythm, it was a piece of cake.
I wished this pattern looked a bit more like the knitting entrelac stitch. While it is similar, it's not exactly the same. With knitting, the direction of the yarn alternates with each diamond row. With the Tunisian crochet the stitch direction stays the same. I'm sure there is a way to change this, but I'm not advanced enough to figure it out.
This pattern yields a dense fabric. I think if I was going to make another scarf with this stitch, I'd use a sock weight yarn instead of a worsted weight/4. The scarf would have a much better drape. As it is, it sort of stands up around your face. It's definitely a scarf for wearing on a super cold day, and not a fashion accessory style scarf like the others I've made.
The yarn I used for this scarf was 100% acrylic Loops and Threads Impeccable in: Amethyst, Kelly Green and Ginseng, purchased at Michael's.
Friday, March 29, 2013
Chunky Braid-y Scarf
This Chain Loop Scarf by
Hidden Daisyy was so much fun to make. Probably because it stitched up lickety split.
The whole thing is a series of several chains closed to make individual loops. Then you wrap the loops with yarn on one side to keep them together.
I think this is a perfect scarf for the beginner who hasn't quite figured out how to move past chaining onto making a second row with single or double crochet.
I think the loops look sort of like they were braided. This effect is a result of using super bulky yarn, often classified as a 6 on the label.
For this scarf I used slightly more than one skein of Lion Brand Yarn Hometown USA in Portland Wine. Each Skein in this brand is 5 oz or 81yds.
Blockett thought this yarn was very scratchy. I don't know what she was talking about. It's a very soft 100% acrylic yarn. I think it was thick and bulky, and she didn't like it up so close to her neck.
I chose purple for this scarf because, at the time, the Vikings were doing really well. Of course, I was finishing up this scarf while watching the game that eliminated them from the play-offs. Serves me right for trying to display a little team spirit. They've got all spring and summer to get their act together, right? RIGHT!? sigh.
The whole thing is a series of several chains closed to make individual loops. Then you wrap the loops with yarn on one side to keep them together.
I think this is a perfect scarf for the beginner who hasn't quite figured out how to move past chaining onto making a second row with single or double crochet.
I think the loops look sort of like they were braided. This effect is a result of using super bulky yarn, often classified as a 6 on the label.
For this scarf I used slightly more than one skein of Lion Brand Yarn Hometown USA in Portland Wine. Each Skein in this brand is 5 oz or 81yds.
Blockett thought this yarn was very scratchy. I don't know what she was talking about. It's a very soft 100% acrylic yarn. I think it was thick and bulky, and she didn't like it up so close to her neck.
I chose purple for this scarf because, at the time, the Vikings were doing really well. Of course, I was finishing up this scarf while watching the game that eliminated them from the play-offs. Serves me right for trying to display a little team spirit. They've got all spring and summer to get their act together, right? RIGHT!? sigh.
Wednesday, March 27, 2013
Infinity Scarves
I fell in love with this artfully simple infinity scarf
by Moogly back in December. It was one of the patterns I took up with me when I visited my mom over Christmas.
I messed up stitching it the first time so I wound up ripping the whole thing out 4 rows into it. The first row had gotten insanely twisted up on itself. So much so, by the time I got to the fourth row it was nearly impossible to add a fifth row. Once I figured that out, it stitched up super fast.
As this scarf took up an entire skein of yarn, and I bought the yarn up in MN, and promptly tossed the label in the trash once I finished, I have no idea what sort of yarn I used. While I liked the scarf, I thought it looked a lot bulkier and thicker than the one over at Moogly.
Shortly after I returned home, I found myself in the yarn section of Joann Fabrics. (Amazing how that happens! It's like magic!) The store that is closest to my house has a much larger yarn section than the one by my mom in Minnesota. I even found the brand used in the original scarf (Red Heart Boutique Unforgettable.) When I got home I discovered I chose the exact same color (tidal) as in the instructions. (Great minds think alike!)
I think the second scarf has a much nicer drape.
Here are the 2 scarves side by side. The one on the top is the second scarf I made. Even though both yarns were labeled by the manufacturer as a "4" or worsted, the yarn used to make the yarn on the bottom was a lot thicker.
Also notice how the first scarf has a mottled look, and the second scarf looks almost striped. Both scarfs were variegated, but the Red Heart Boutique Unforgettable yarn's color change was much longer than the first yarn I used. When I bought the first yarn I thought it DID have a long length before the color change, but I was clearly mistaken. So, if you want the stripy look for your scarf and you cant find Red Heart Boutique Unforgettable, look for a yarn that has a very long stretch of the same color before it fades into the next one on your skein!
| Yes, I know these pictures were taken in the bathroom. It's been super cloudy and it was the only place in the house that had halfway decent light. |
As this scarf took up an entire skein of yarn, and I bought the yarn up in MN, and promptly tossed the label in the trash once I finished, I have no idea what sort of yarn I used. While I liked the scarf, I thought it looked a lot bulkier and thicker than the one over at Moogly.
Shortly after I returned home, I found myself in the yarn section of Joann Fabrics. (Amazing how that happens! It's like magic!) The store that is closest to my house has a much larger yarn section than the one by my mom in Minnesota. I even found the brand used in the original scarf (Red Heart Boutique Unforgettable.) When I got home I discovered I chose the exact same color (tidal) as in the instructions. (Great minds think alike!)
| Blockette is so kind to be my model! |
I think the second scarf has a much nicer drape.
Here are the 2 scarves side by side. The one on the top is the second scarf I made. Even though both yarns were labeled by the manufacturer as a "4" or worsted, the yarn used to make the yarn on the bottom was a lot thicker.
Also notice how the first scarf has a mottled look, and the second scarf looks almost striped. Both scarfs were variegated, but the Red Heart Boutique Unforgettable yarn's color change was much longer than the first yarn I used. When I bought the first yarn I thought it DID have a long length before the color change, but I was clearly mistaken. So, if you want the stripy look for your scarf and you cant find Red Heart Boutique Unforgettable, look for a yarn that has a very long stretch of the same color before it fades into the next one on your skein!
Monday, March 25, 2013
Crochet Bath Puff
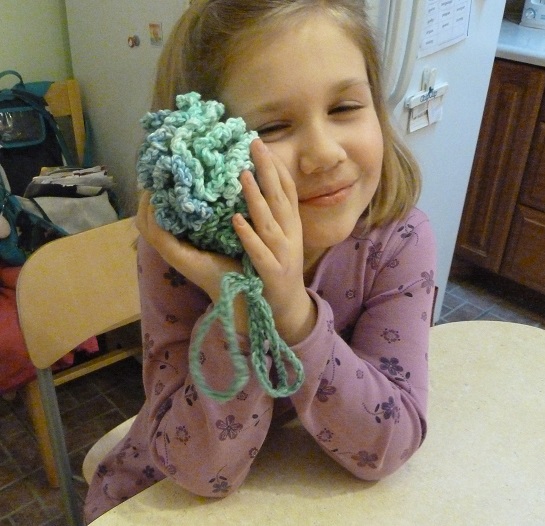
I made this Bath puff by Fresh Mint back in February. It sat on a shelf in the basement until last week, when I finally decided to take pictures of all the things I had crocheted over the past month or so.
The yarn I used is called Lily Sugar'n Cream, and the color is country stripes. The poof took almost one full skein. Because the yarn I used was an ombre where it gradually changed from one color to the next, I opted not to use multiple colors as the pattern suggested.
Also, when making the tie thingie that scrunches the poof up, I didn't switch colors mid way. One of the comments suggested doubling the length of the tie and weaving it through the whole thing so it could tie at one end. The ends of the ties are slip stitched ends together, which eliminated the need for hearts at the end. This made for a loop where it can be hung in the shower.
Here's what the poof looks like stretched out:
So how does it scrub up?
Hmmm...not very much to my liking.
As a personal preference, I like my scrubbies to have a bit of exfoliating power. This had zero. It was just too soft! I know that there are some of you that like that sort of thing, but it's not my cuppa tea.
Now I don't know what to do with it. I've used it, so I can't really give it away, but I have no desire to use it again. Any suggestions? Should I unravel it and reuse the yarn for something else? Toss it? Let Blockette use it to wash her bike? I have no idea.
Friday, February 8, 2013
Wide Crochet Ear-Brassiere
The end of January brought us the coldest day here since Feb 2011. When I went to work one morning, the wind chill it was 15 below zero. Of course, that same day the actual temp at my mom's house only made it up to -3. Clearly living in Chicagoland for the past 13 or so years has made me a wimp!
Of course when I was living in Minnesota if I was outside for any extended period of time I was doing something active like shoveling or running to class. Standing outside is a whole different ball of wax. There is only so much room that I can pace, hop and dance around.
I knew this really cold day was coming so I got to thinking about what I could do to stay warm outside. Obviously I would wear layers of long underwear, but I didn't thing that was enough. I noticed that on windy days my ears and forehead would get cold. I have a hat with ear flaps that usually keeps me warm enough, except when the wind blows stronger than 20 mph.
Then I saw Mrblocko wearing what we call an ear brassiere. I thought wearing one of those over my hat would stop the wind from getting through and cover more of my forehead. I didn't want to steal his as he would need it to stay warm until his car heated up. So I decided to see if I could crochet one.
I found this pattern for a Wide Headband with ribbing stitch over at Crochet Geek. The stitches seemed simple enough and there was a great video. I don't know about you, but I always do better when I can actually see what it is I'm supposed to be crocheting before I do it.
The whole thing took me 3.5 hours to complete. This was from start to finish. When I mean from start to finish, I'm including: choosing the yarn, beginning the pattern and discovering the yarn was too thin, picking out another yarn, and all the other normal interruptions that go along with having your husband and daughter home for the day. (What, it's like they expect to talk to me over the weekends and stuff. The nerve of those people!!!)
The yarn I finally settled on was Joann Fabric brand Sensations Angel Hair in Berry stitched up with an H hook.(The yarn that was too thin was Red Heart Baby TLC in case you were curious.)
I didn't have to crochet as many rows as the pattern said. Maybe my head is smaller than I think it is. Naaah. I probably just crocheted looser and with thinner yarn than the sample.
This pattern is worked in rows, not in the round. So it was really easy to adjust for my head size. If I had been working the headband in the round I wouldn't have discovered it would be too big until several rows, and I would have had to restart the whole thing. When I realized the headband was too big, I just undid a few rows and whip stitched the band together.
Blockette says she wants one now. I'll have to make the band narrower if I get around to making her one. I'd say I'd have to make the foundation chain 8 stitches instead of 14 in the tutorial.
I'm so proud of this ear warmer. It's absolutely perfect for what I need it for. On really cold days I have the top edge of it go down under my glasses, just above my eyes. That way, with a scarf wrapped around my mouth and nose, the only thing exposed to the cold wind are my eyes. It's perfect!
p.s. Blockette was my wonderful photographer for this lovely little photo shoot. She had lots of fun, and even "styled" my hair for the last picture so it had pretty curls instead of a mat of nargles in the back.
Of course when I was living in Minnesota if I was outside for any extended period of time I was doing something active like shoveling or running to class. Standing outside is a whole different ball of wax. There is only so much room that I can pace, hop and dance around.
I knew this really cold day was coming so I got to thinking about what I could do to stay warm outside. Obviously I would wear layers of long underwear, but I didn't thing that was enough. I noticed that on windy days my ears and forehead would get cold. I have a hat with ear flaps that usually keeps me warm enough, except when the wind blows stronger than 20 mph.
Then I saw Mrblocko wearing what we call an ear brassiere. I thought wearing one of those over my hat would stop the wind from getting through and cover more of my forehead. I didn't want to steal his as he would need it to stay warm until his car heated up. So I decided to see if I could crochet one.
I found this pattern for a Wide Headband with ribbing stitch over at Crochet Geek. The stitches seemed simple enough and there was a great video. I don't know about you, but I always do better when I can actually see what it is I'm supposed to be crocheting before I do it.
The whole thing took me 3.5 hours to complete. This was from start to finish. When I mean from start to finish, I'm including: choosing the yarn, beginning the pattern and discovering the yarn was too thin, picking out another yarn, and all the other normal interruptions that go along with having your husband and daughter home for the day. (What, it's like they expect to talk to me over the weekends and stuff. The nerve of those people!!!)
The yarn I finally settled on was Joann Fabric brand Sensations Angel Hair in Berry stitched up with an H hook.(The yarn that was too thin was Red Heart Baby TLC in case you were curious.)
I didn't have to crochet as many rows as the pattern said. Maybe my head is smaller than I think it is. Naaah. I probably just crocheted looser and with thinner yarn than the sample.
This pattern is worked in rows, not in the round. So it was really easy to adjust for my head size. If I had been working the headband in the round I wouldn't have discovered it would be too big until several rows, and I would have had to restart the whole thing. When I realized the headband was too big, I just undid a few rows and whip stitched the band together.
Blockette says she wants one now. I'll have to make the band narrower if I get around to making her one. I'd say I'd have to make the foundation chain 8 stitches instead of 14 in the tutorial.
I'm so proud of this ear warmer. It's absolutely perfect for what I need it for. On really cold days I have the top edge of it go down under my glasses, just above my eyes. That way, with a scarf wrapped around my mouth and nose, the only thing exposed to the cold wind are my eyes. It's perfect!
p.s. Blockette was my wonderful photographer for this lovely little photo shoot. She had lots of fun, and even "styled" my hair for the last picture so it had pretty curls instead of a mat of nargles in the back.
Thursday, February 7, 2013
I've got Big Buns
Yeah I've secretly been wanting to write "big buns" as a post title for YEARS. Finally, the opportunity has presented itself! Actually, this is another post about....
Crochet!
Hooray!
This is another thing I made over Christmas. I think it's a perfect thing for a beginner as it is just a single crochet rectangle whip stitched together.
Um...so what IS it?
It's a "sock" bun! There are a bunch of hair styling tutorials (here and here are the ones I've seen most) out there on using a sock to give volume to a hair bun. There is even a tutorial on how to get big "no heat" curls using a sock bun.
Basically what you do is cut the toe off an old sock and roll it into a donut. You want the sock to be similar to your hair color in case the donut shows through. Personally, I think putting a sock in your hair is gross. I don't want something that was on my feet to be in my hair. I know the socks are clean, but it just ooks me out for some reason.
Then I saw this crocheted pattern from sock bun over at Crochet Dynomite. I even had brown yarn leftover from a craft project from years ago.
I must have used thicker yarn, or crocheted looser than the sample over at Crochet Dynomite because my bun was REALLY big!
One of the benefits to using a crocheted bun roll vs a sock, is that
you can easily stick bobby pins through the entire bun so the whole
thing is super secure. I put this bun in my hair to keep it out of my
way while I scrubbed the dinning room floor after we had the ceiling fixed. The dry wall dust got into every crack and crevasse on the wood floor, so there was some serious scrubbing going on.
Had I just used a butterfly clip it would have fallen out after 15 min. Those things never stay in my hair unless it's soaking wet. The fact that this style stayed in my dry hair while I cleaned was awesome.
I didn't get a chance to test out the sock bun curls. In the winter, I wear my hair down for extra warmth when I go to work, so I had to take the bun out after a few hours.
And for my fellow geeks: Yes, I did make two buns, just in case I want to rock it Princess Leia style
Crochet!
Hooray!
This is another thing I made over Christmas. I think it's a perfect thing for a beginner as it is just a single crochet rectangle whip stitched together.
| (Yes, that IS Ariel standing on her head in the background. It's the only way to get ALL the water out of her tail so that nasty black mold doesn't grow in there.) |
It's a "sock" bun! There are a bunch of hair styling tutorials (here and here are the ones I've seen most) out there on using a sock to give volume to a hair bun. There is even a tutorial on how to get big "no heat" curls using a sock bun.
Basically what you do is cut the toe off an old sock and roll it into a donut. You want the sock to be similar to your hair color in case the donut shows through. Personally, I think putting a sock in your hair is gross. I don't want something that was on my feet to be in my hair. I know the socks are clean, but it just ooks me out for some reason.
Then I saw this crocheted pattern from sock bun over at Crochet Dynomite. I even had brown yarn leftover from a craft project from years ago.
I must have used thicker yarn, or crocheted looser than the sample over at Crochet Dynomite because my bun was REALLY big!
| Ugh, it's a pain to try to take a picture of the back of your own head. |
Had I just used a butterfly clip it would have fallen out after 15 min. Those things never stay in my hair unless it's soaking wet. The fact that this style stayed in my dry hair while I cleaned was awesome.
I didn't get a chance to test out the sock bun curls. In the winter, I wear my hair down for extra warmth when I go to work, so I had to take the bun out after a few hours.
And for my fellow geeks: Yes, I did make two buns, just in case I want to rock it Princess Leia style
Wednesday, February 6, 2013
Blockette's Soap Savers
Yes, more crochet!
I've been sort of a crochet nut as of late. I feel like I'm being more productive crocheting than I am cross stitching. I guess it's cause I'm making something I can actually use with the crochet, and the cross stitch just sits there, most of the time not even finished into something suitable for framing. Now that I think about it, if you figure in the cost of framing, crocheting is a lot cheaper hobby than cross stitching.
Anyhow, onto the latest crochet project. I actually made these while I was up at my mom's over Christmas. I saw the pattern for soap savers when I stumbled across the blog Moogly. I thought they would be a good solution to a problem we were having.
Maybe those of you with kids have this problem too. You see when Blockette was bathing herself, she was either putting too much soap on her bath poof, or not enough. We tried going the bar of soap and wash cloth route, but she wasn't getting enough soap on the wash cloth to get a lather on her body. Also, whenever Mrblocko or I took a shower, her bar of soap was getting wet and washing down the drain.
This little crochet pouch solves that problem! There is no pouring the soap on anything. The soap is right there! The in between step of putting the soap on the washcloth is eliminated as well. Essentially, the soap is inside the washcloth. The pouch also keeps the soap from washing down the drain, or half the bar getting stuck to the shelf in the shower.
See, that "gummy" wet soap is contained inside the soap saver! No more soap gunk sticking to the shower shelf!
Also, you can use the bar of soap down to nothing. No waste. If Blockette breaks the bar once it's tiny, no big deal, the pieces will stay inside the soap saver.
I made two in case one needed to be washed. That way Blockette couldn't use the excuse that she couldn't take a shower because her scrubby was in the hamper.
Because I'm still a crochet newbie, I had to work each of them up more than once. It wasn't until my mom suggested using a stitch marker when I completed each row, that I finally got the hang of things. My stitch marker was super fancy. I just used the tail from the beginning of the stitching and moved it up each row. Then when I finished, I just wove the rest of the tail in as normal. That worked out better than having to keep track of some separate piece of yarn, or one of those plastic yarn markers you can purchase.
The multi colored scrubby was stitched in Lily Sugar'n Cream Psychedelic and the blueish one in Swimming Pool. This yarn is 100% cotton, medium or 4. I used the recommended I hook.
One word of warning. If you use Sugar n Cream yarn, in a dark color (particularly the blues), it will bleed. Unless you like blue dye in your shower, I highly suggest you wash the soap saver at least once with a color catcher. This will save you from any panic that you've permanently stained your tub blue.
I've been sort of a crochet nut as of late. I feel like I'm being more productive crocheting than I am cross stitching. I guess it's cause I'm making something I can actually use with the crochet, and the cross stitch just sits there, most of the time not even finished into something suitable for framing. Now that I think about it, if you figure in the cost of framing, crocheting is a lot cheaper hobby than cross stitching.
Anyhow, onto the latest crochet project. I actually made these while I was up at my mom's over Christmas. I saw the pattern for soap savers when I stumbled across the blog Moogly. I thought they would be a good solution to a problem we were having.
| soap saver with full bar of soap, nubby scrubby side |
This little crochet pouch solves that problem! There is no pouring the soap on anything. The soap is right there! The in between step of putting the soap on the washcloth is eliminated as well. Essentially, the soap is inside the washcloth. The pouch also keeps the soap from washing down the drain, or half the bar getting stuck to the shelf in the shower.
| soap saver with used bar of soap, non nubby scrubby side |
Also, you can use the bar of soap down to nothing. No waste. If Blockette breaks the bar once it's tiny, no big deal, the pieces will stay inside the soap saver.
I made two in case one needed to be washed. That way Blockette couldn't use the excuse that she couldn't take a shower because her scrubby was in the hamper.
Because I'm still a crochet newbie, I had to work each of them up more than once. It wasn't until my mom suggested using a stitch marker when I completed each row, that I finally got the hang of things. My stitch marker was super fancy. I just used the tail from the beginning of the stitching and moved it up each row. Then when I finished, I just wove the rest of the tail in as normal. That worked out better than having to keep track of some separate piece of yarn, or one of those plastic yarn markers you can purchase.
The multi colored scrubby was stitched in Lily Sugar'n Cream Psychedelic and the blueish one in Swimming Pool. This yarn is 100% cotton, medium or 4. I used the recommended I hook.
One word of warning. If you use Sugar n Cream yarn, in a dark color (particularly the blues), it will bleed. Unless you like blue dye in your shower, I highly suggest you wash the soap saver at least once with a color catcher. This will save you from any panic that you've permanently stained your tub blue.
Tuesday, February 5, 2013
Crochet Dish Scrubbie
I saw this pattern for a dish scrubby by Mrs.Greene, and I thought, hmmm I wonder how well something like that would work.
This scrubby uses mesh bags, like those onions are packaged in. You cut the bag into strips and loop them together. The mesh "yarn" is crocheted along with a traditional yarn carrier thread onto a crocheted base, for structure. You are going to be scrubbing dishes with this after all, you don't want it to be flimsy!
I chose Lily Sugar'n Cream Strawberry scents as the base yarn. It wasn't to make the dishes smell nice, or prevent the sponge from stinking, but because I had a small amount of it left from making the mug cozy for Blockette.
Because I wanted some contrast, I used Sugar'n cream Playtime as the carrier thread to go along with the mesh bag plarn. What a pain to crochet with. The Plarn was so stiff, and the edges were prickly and pokey. They did not want to play nice at all. (I may have said a bad word or twelve at the uncooperative plarn. Good thing I was home alone and the kitties were asleepin')
I stitched the base with a G hook, but I had to go up to H hook to crochet with the plarn. I had to fight a lot less with the plarn with the larger hook.
The tip about laying the scrubby flat was very helpful. Holding the worked crocheting vertical like I normally do was not working at all. The plarn stitching was weird and distorted. As soon as I ripped that nasty looking stuff out and started crocheting with my base laying on the counter, things started to look right and proper.
The cloth warped quite a bit so the scrubbie looked more like a rhomboid than a rectangle. I'm not too worried about it as it is only going to be used to clean dishes and not the Queen of England.
What I like about this scrubby is that you wind up with a super scrubby side:
AND a light scrubby side:
Because sometimes the dishes don't need a heavy duty scrub.
So how does it work for actually cleaning the dishes?
Not too bad. I'd say it works as well as that blue sponge you see sitting on the sink in the above pictures, with the added benefit of being able to toss it in the washing machine when it gets stinky. Yeah I know that you can nuke a sponge to get rid of the smell, but there are only so many times you can do that before the sponge is so gross microwaving it no longer works.
We'll see how long this dish scrubby lasts in comparison to a sponge before it falls apart.
This scrubby uses mesh bags, like those onions are packaged in. You cut the bag into strips and loop them together. The mesh "yarn" is crocheted along with a traditional yarn carrier thread onto a crocheted base, for structure. You are going to be scrubbing dishes with this after all, you don't want it to be flimsy!
I chose Lily Sugar'n Cream Strawberry scents as the base yarn. It wasn't to make the dishes smell nice, or prevent the sponge from stinking, but because I had a small amount of it left from making the mug cozy for Blockette.
Because I wanted some contrast, I used Sugar'n cream Playtime as the carrier thread to go along with the mesh bag plarn. What a pain to crochet with. The Plarn was so stiff, and the edges were prickly and pokey. They did not want to play nice at all. (I may have said a bad word or twelve at the uncooperative plarn. Good thing I was home alone and the kitties were asleepin')
I stitched the base with a G hook, but I had to go up to H hook to crochet with the plarn. I had to fight a lot less with the plarn with the larger hook.
The tip about laying the scrubby flat was very helpful. Holding the worked crocheting vertical like I normally do was not working at all. The plarn stitching was weird and distorted. As soon as I ripped that nasty looking stuff out and started crocheting with my base laying on the counter, things started to look right and proper.
The cloth warped quite a bit so the scrubbie looked more like a rhomboid than a rectangle. I'm not too worried about it as it is only going to be used to clean dishes and not the Queen of England.
What I like about this scrubby is that you wind up with a super scrubby side:
AND a light scrubby side:
Because sometimes the dishes don't need a heavy duty scrub.
So how does it work for actually cleaning the dishes?
Not too bad. I'd say it works as well as that blue sponge you see sitting on the sink in the above pictures, with the added benefit of being able to toss it in the washing machine when it gets stinky. Yeah I know that you can nuke a sponge to get rid of the smell, but there are only so many times you can do that before the sponge is so gross microwaving it no longer works.
We'll see how long this dish scrubby lasts in comparison to a sponge before it falls apart.
Saturday, January 5, 2013
Mug Cozies
I've been on this massive crochet kick lately.
Here is one of the things I've made recently:
It's a mug cozy!
What's a mug cozy you ask?
It's a thing that goes around your mug so you can actually hold onto it without burning your hands. It also functions as a coaster as the cozy goes under the mug as well.
I had so much fun making one, I decided to make one for each of us.
As you can see from the above picture, they really fit almost any mug. Even Mrblocko's weird slanty sided mug.
They've really come in handy this week as I've been drinking gallons and gallons of tea in hopes that it will magically cure my cold.
Oh, and as an added bonus....
The tea cozies also do double duty as stylish hats for your old men cats.
Doesn't Basil look like he LOVES his new hat?
He's so fashionable.
If you'd like to make your own mug cozy/cat hat, I got my pattern from Micah Makes as a free download.
Here is one of the things I've made recently:
It's a mug cozy!
What's a mug cozy you ask?
It's a thing that goes around your mug so you can actually hold onto it without burning your hands. It also functions as a coaster as the cozy goes under the mug as well.
I had so much fun making one, I decided to make one for each of us.
As you can see from the above picture, they really fit almost any mug. Even Mrblocko's weird slanty sided mug.
They've really come in handy this week as I've been drinking gallons and gallons of tea in hopes that it will magically cure my cold.
Oh, and as an added bonus....
The tea cozies also do double duty as stylish hats for your old men cats.
Doesn't Basil look like he LOVES his new hat?
He's so fashionable.
If you'd like to make your own mug cozy/cat hat, I got my pattern from Micah Makes as a free download.
Tuesday, December 27, 2011
'11 Happy Dance #39 and #40: Needle Cases
More Christmas presents! These I made for my mom who was complaining that she didn't like the disorganization of having all her crochet hooks and knitting needles in a plastic bag.
Here is the case I made for her crochet hooks:
The pink in the photo is less mauve-y in real life. I don't know why the colors turned out so wonky. I tried taking the picture on different backgrounds and with different light sources with no success.
My best friend's mom made me a crochet hook case, so I used that as a pattern for this one.
I thought I had lined up the pattern with the fabric lines, but apparently not. We'll just call it modern. All the "Modern" quilts are askew and off center. Yeah. I meant to make it that way. Cutting edge dontcha know!
Here is the knitting needle case:
It is the mother of all knitting needle cases. This baby is huge. As I had no idea of what sizes or quantities of knitting needles my mom had I wanted to make sure there was lots and lots of room. I figured it was better to have too much storage rather than not enough.
I found the pattern for this case here at Alexandra's Knits. I looked at lots and lots of tutorials online and this one was my favorite. Besides the ones you can buy at the fabric store are really tiny and frankly, quite ugly. (Although Blockette disagreed because they were sort of rainbowy colored, if you squinted, and "how could you call a rainbow ugly? Huh? Why do you think rainbows are ugly mom?" Sigh.)
Here is the case I made for her crochet hooks:
The pink in the photo is less mauve-y in real life. I don't know why the colors turned out so wonky. I tried taking the picture on different backgrounds and with different light sources with no success.
My best friend's mom made me a crochet hook case, so I used that as a pattern for this one.
I thought I had lined up the pattern with the fabric lines, but apparently not. We'll just call it modern. All the "Modern" quilts are askew and off center. Yeah. I meant to make it that way. Cutting edge dontcha know!
Here is the knitting needle case:
It is the mother of all knitting needle cases. This baby is huge. As I had no idea of what sizes or quantities of knitting needles my mom had I wanted to make sure there was lots and lots of room. I figured it was better to have too much storage rather than not enough.
I found the pattern for this case here at Alexandra's Knits. I looked at lots and lots of tutorials online and this one was my favorite. Besides the ones you can buy at the fabric store are really tiny and frankly, quite ugly. (Although Blockette disagreed because they were sort of rainbowy colored, if you squinted, and "how could you call a rainbow ugly? Huh? Why do you think rainbows are ugly mom?" Sigh.)
Subscribe to:
Posts (Atom)