Wednesday, February 29, 2012

Springtime Wreath

 Have I ever mentioned that I greatly dislike our front door? I don't know why.  It's got this fancy carving stuff all over the outside of it.  I think the flowers might even be Tudor Roses.  You'd think I'd be gaga for it.  I'm not.  Just one of those things I guess.

So, in attempts to detract from the pattern, I've decided to hang stuff on the door.  We have a Christmas wreath and a fall wreath, but, as it is getting to be more and more spring-like, those two wreaths just aren't cutting it for me. I found this neat tutorial for a spring-y wreath over at PS Capture the Details.
All you need is a foam wreath form, Lime green Lion brand fun fur yarn (which looks so much like newly sprouted grass...the lighting was funky today so the colors are showing up muted), pins, some sort of flower and a ribbon for hanging.

The original tutorial calls for using bits of a floral trim.  I opted for using these fake flowers.  I didn't care for the floral trim and the fake flowers were on sale. 

I spent around $14 on supplies.  I wound up needing slightly more than 1 skein of yarn as I used a 10" wreath form, not an 8" wreath form as the tutorial suggested.  So, I have almost a full skein of the fuzzy green yarn left for another project, along with most of the ribbon, and a good portion of the fake flowers.  I would say I used only $8-$10 worth of supplies.  Not too shabby for a cheery touch of spring!

Tuesday, February 28, 2012

Quick Rye Bread

I wanted some bread to go with dinner the other night, but I just wasn't feeling all the prep work of making a yeasted bread. I thought this recipe for Rye bread posted on Cookie Madness might just fit my lazy attitude and carby craving. (Also, I bought this bag of rye flour back in May and have only used it once.)

I'm really unfamiliar with savory quick breads, and have only ever baked with Rye once before.  I was really interested as to how this loaf was going to turn out.
Mrblocko said he was surprised how light the texture was.  I can see why he might think the bread would be a bit rougher. The dough gets baked in a cake pan so it looks sort of like corn bread. Perhaps because of the shape, he was expecting the grittiness of corn bread. Or maybe he has just had some really dense and hearty rye breads.

I was surprised at how light the texture was too.  My bread has a tendency to be on the dense side.  Even though this bread doesn't get a lot of lift, it had a great crumb to it.  The bread even held up well after spending a few days in the fridge.  Sometimes bread will get super crumbly after a few days, but this leftover bread was fairly mess free when sliced and eaten.  I also noticed that it wasn't so dry that it HAD to have butter.  It was still really good on it's own.

I will make this bread again for sure, and not just to use up the remainder of my bag of Rye flour!

Mary's Quick Rye Bread a la Cookie Madness
1 cup all-purpose flour
1 cup rye flour
2 teaspoons baking powder
1/2 teaspoon baking soda
1 /2 teaspoon coarse sea salt
1 /4 cup salted, melted butter
2 large, beaten eggs
1 /4 cup honey
3 /4 cup full fat yogurt (I used fat free sour cream)

Preheat oven to 350F. Grease 8"cake pan. Combine flours, baking powder and soda, and salt in a small bowl. Blend butter, eggs, honey and yogurt/sour cream in a large bowl. Add the dry to the wet ingredients. Mix til just incorporated.  Press batter into cake pan. Bake 37-40 min, til pick comes out clean.

Monday, February 27, 2012

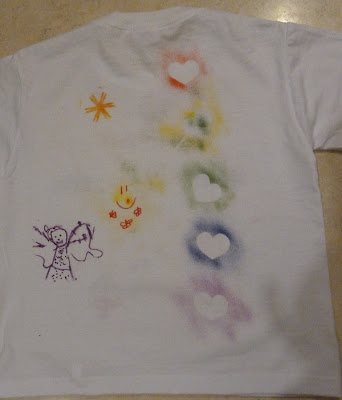
Fairy Stencil Shirt

Blockette got a Tinkerbell Spray t shirt decorating thingamajig for Christmas from her Grandma.  This past weekend we finally got around to using it.

It had these pens that you could either use to draw with, or could attach with this straw thingie and use as sort of spray paint.  Blockette and I are both getting over colds so it was rather amusing to watch us attempt to use the blow paint. 

This shirt was 95% Blockette's ideas and concepts.  She really knew what she wanted to do!  I was allowed to put use my idea of vines around the neckline, and to use the hearts on the back.  Other than that, it was all her. 

Here is our finished project:
Tshirt front

Tshirt back

I think my favorite thing is the fairy drawn on the back.  She is just too too cute.

We still have plenty of ink left in the markers for other projects, but I think we'll save it for a time when Blockette and I aren't so hacky and stuffy from colds.

Friday, February 24, 2012

Cake Batter Krispies

Woah. Does a box of cake mix ever go a long way. Back in September I made cake batter ice cream with Strawberry cake mix.  The ice cream only used up 2/3 c of the cake mix, so in October I made some cake batter pancakes.  The pancakes used another 2/3 c of cake mix.  I still had A LOT of cake mix left, so for Christmas I made Cake batter truffles.  The truffles used a whopping cup of cake mix.  But, man, even after I made those truffles, I still had cake mix left!

Hmmm...what to make with all that leftover strawberry cake mix?  After a few months of pondering, I decided to make Cake Batter Rice Krispie Treats.   I saw them first over at How Sweet it Is.  Then I saw a Red Velvet Version over at Runs with Spatulas where she used double the amount of cake mix.  Awesome!

I went ahead and doubled the recipe, as I was making them as a fundraiser for Relay for Life.  This was a wise move because at least 2 other teams were selling scrawny little krispie treats.  I sorta kinda felt sorry for them (the krispie treats and the other teams.)

These bad boys were the kind of Rice Krispie Bar where you almost need to unhinge your jaw to take a bite.  In my book, there really shouldn't be any other kind.
As you can see in the above photo, they are HUGE!  It was Mrblocko's idea to use the can of pop for scale, and he is my lovely hand model.  Didn't he do a great job?  Let's all give him a hearty round of applause.

*crickets*

OK honey, maybe you shouldn't quit your day job.

Anyhow, I have no idea how many sprinkles I used.  We had a large tub of sprinkles left over from Blockette's birthday party, so I just dumped in sprinkles until I thought the treats looked sufficiently sprinkle-y.  I figured you can never have too many sprinkles.

Now you would think that since the Red Velvet cake mix turned the krispie treats a nice bright red, the strawberry cake mix would have turned the treats pink.  Nope.  They only had a slight pinkish tinge.  I supposed I could get a better pink by adding food coloring or using pink marshmellows.  Maybe I will do that for the next Relay for Life bake sale.

As I made a double thick batch of krispie treats, I wound up using a full cup of the strawberry cake mix.  That left me with a running total of 3 1/3c of cake mix used, just from one box. Oh, and there's a still a few tablespoons left.  I haven't decided if I'm going to pitch this tiny remainder of mix, or find something else to use it in.  Anyone have any ideas as to how to use up a few Tablespoons of cake mix?

Super Thick Cake Batter Treats from How Sweet it Is and Runs with Spatulas
6 tablespoons butter or margarine (divided)
2 10-ounce bags of mini marshmallows
2 t vanilla (divided)
1 cup cake mix (divided)
12 cups rice krispies cereal (divided)
sprinkles and more sprinkles

Prepare a 9x13 pan by lining it with wax paper and spraying it well with Cooking Spray.  I like to use the super cheater microwave method.  In a large micro safe bowl, melt 3 T margarine for 30 sec.  Add 1 bag of marshmallows and stir until coated.  Nuke for 30 sec, stir.  If mixture is still lumpy, nuke another 30 sec. At this point you need to work quickly so the marshmallows don't set up. Add 1t vanilla and 1/2c cake mix.  Stir until combined.  Add 6 c krispies and sprinkles of your desired amount.  Stir until krispies are coated and sprinkles are evenly distributed.  Pour/dump into prepared pan.  Press into corners with greased hands, or a sheet of wax paper that has been sprayed really well with cooking spray.  Rinse out the bowl.  (No need to get fancy and use soap.)  Dry the bowl and repeat with your remaining ingredients.  Let the bars set for an hour or two before lifting out and cutting.

Thursday, February 23, 2012

2012 Thankful Thurs #8

1.I took Blockette to the Dr even though she "only" had a cough and no fever.

2. She didn't have Bronchitis like I feared.

3. She has learned her lesson about not wearing her hat at recess, even though it's only a little chilly out.

4. I raised nearly $60 for the Relay for Life kickoff selling soup and baked goods.

5. Blockette saying "I love you" out of the blue.

6. Blockette mentioning that she's never heard me yell. (I have totally lost it on more than one occasion, so this must mean that she has forgotten about that.  Maybe I haven't scarred her for life?  At least not yet.)

7.Being productive at home, even if they are just little projects...they add up!

8. Sitting at church with Mrblocko on Wed.

9. Feeling better on the new probiotics. (Maybe this will do the trick...knock on wood.)

10. I got my sewing machine back!  Whooohooo!

Wednesday, February 22, 2012

Math Problems

Blockette came to me the other day complaining about how she was having trouble with her math workbook.  She said she just couldn't figure it out.  I was surprised because she is awesome with word problems.  See if you can fare any better.  (Keep in mind this is a First Grade Workbook.)

There is a horse race. Figure out how each of the horses placed with the following information:

Nibbles did not run as fast as Buckwheat.
Betty did not run as fast as Rosie.
Betty did not come in last.


Tuesday, February 21, 2012

Mint Hot Chocolate Cookies

Seeing as it hasn't been bitterly cold (knock on wood) this winter, no one in the house has been jazzed about hot chocolate.  This has left me with a plethora of hot chocolate mix, particularly as I prefer the stuff made with actual melted chocolate to the powdered mix.

I had 4 different types of hot chocolate mix!  How did that happen?  I found this recipe for cocoa peanut vegan cookies, on Babble that that uses hot chocolate mix.  Yes, hot chocolate mix.  The sweetened stuff, not cocoa powder.  Score!

Now my cookies weren't particularly vegan, as my hot chocolate mix contained milk, and so did my chips.  The thing is that you could totally vegan these bad boys up.  Or they would be perfect for someone with an egg or milk allergy! 
I did not have any peanuts, but I did have one and a half bags of mint and dark chocolate chips.  I have no idea how old they were, but the chocolate had begun to bloom.  The chocolate chips were ugly, but I figured if they were inside a cookie, no one would see them.  I used all one and a half bags of mint chocolate chips in place of the chocolate chips and peanuts.  They were a mighty fine substitution.

These were by far the softest cookies I have ever made.  I imagine that was due to the lack of fat (shortening/butter) and egg binder. By day three the cookies were so soft, they were sticking to each other and falling apart when you held them.  I tried to remedy this by leaving them in an unsealed container.  That did absolutely nothing.  I think a better solution would have been to store them in the freezer.  I will do that with the next batch.

Cocoa Peanut Chocolate Chip Cookies from Babble
2 cups + 2 Tbsp whole-wheat flour
1/3 cup sweetened cocoa powder (dairy-free for vegan cookies)
1/2 tsp salt
2 tsp baking soda
1/2 cup water
1 cup sugar
1/3 cup safflower oil (veg oil)
1/2 cup applesauce
3 Tbsp creamy peanut butter (soften in microwave if needed to stir into dough)
1 tsp apple cider vinegar
1/2 cup salted/roasted peanuts
3/4 cup chocolate chips (vegan)
*add more peanuts/choc chips if desired

Preheat oven to 350F. Combine dry ingredients in a large bowl. Stir in the wet ingredients. Fold in the peanuts and chocolate chips. Spoon dough onto greased cookie sheets. (Mine spread out quite a bit, so don't overcrowd them on the sheet.) Bake at 350 for about 11 minutes — or until edges crisp. (Mine baked for 15 min and did not get "crisp.") Cool at least 15 minutes before serving. (or attempting to remove them from the cookie sheet.)

P.S. The original recipe says it makes 16 large cookies.  I used my large cookie scoop and got at least 24 very large cookies, if not more.

P.P.S.  I read over on Cookie Madness, this tip about baking with applesauce: "Drain the applesauce.  Scoop out double the amount you need and dump that on a stack of paper towels.  Using the back of a spoon rub it into a 6" circle and let it sit for 10 min.  Gently press as much water out as you can. Then measure out what you need.  With the excess water removed there will be less steam and therefor a less rubbery product."  I can't wait to give this a try!

Monday, February 20, 2012

Slow Cooker Jambalaya

This probably is the worst photo ever for this wonderfully delicious dish. I found this recipe for slow cooker jambalaya over at one of my favorite blogs, Plain Chicken.  Had I been thinking, I would have waited a week to make this.  So, instead of making it to eat on Fat Tues, I'm writing about it today so that YOU can make it tomorrow!  See, my lack of planning is working in your favor.  Aint it nice when things work out that way?

Not only is this dish easy, it is a people pleaser.  The house was filled with this mouth watering aroma all day long.  Normally I'm not big on cajun or creole flavors, but the smell of this dish made even me drool.

Of course Mrblocko was over the moon as this dish has two kinds of meat in it, chicken and sausage.  Any dish with double the meat is A OK in his book.

Blockette raved about this dish too.  Even as leftovers she couldn't stop talking about how much she liked the Jambalaya and what an awesome mom I was. YES! Maybe that makes up for punching her in the face while trying to help her zip up her coat the other morning.  (Did I mention it was right on her fat lip that she got when she knocked heads with another kid at recess?)  Not one of my more stellar moments.  Grace does run in the family you know.
I had a debate as to whether or not to use my 3 qt crock pot or my large one. I settled on the smaller one. As you can see from the above horrid photo, once I added the rice at the end, the jambalaya came almost to the top of the slow cooker. So keep that in mind when you are making this dish.


Slow Cooker Jambalaya from Plain Chicken
1 pound skinless, boneless chicken breast- cut into 1"cubes (I used 3 large chicken breasts)
1 pound smoked turkey sausage, sliced
1 (28 oz) can diced tomatoes with juice (I used crushed because I didn't want tomato-y bits in my dish)
3 Tbsp dried minced onion flakes (I used 1 T onion powder, as my onion flakes were MIA)
1 cup chicken broth
2 teaspoons dried oregano
2 teaspoons dried parsley
2 tsp minced garlic
2 teaspoons Cajun seasoning (*see below*)
1 teaspoon cayenne pepper (I used 1/4 t cayenne to keep the heat down.)
1/2 teaspoon dried thyme
4-6 cups of white rice or instant rice (I used medium grain rice that I cooked the night before)

In a slow cooker, mix the chicken, sausage, tomatoes with juice, onion, garlic, and broth. Season with oregano, parsley, Cajun seasoning, cayenne pepper, and thyme. Cover, and cook 7 to 8 hours on Low, or 3 to 4 hours on High. Mix in cooked rice cook for about 15 minutes to warm through.

*I happened to have some Cajun seasoning I got for free from Penzeys Spices ages ago.  If you don't have cajun or creole seasoning in your area/want something salt free, here is a great recipe from Munchin with Munchkin:

Creole seasoning from Munchin with Munchkin
4 t paprika
1 ½ t garlic powder
1 ½ t onion powder
1 ½ t black pepper
¼ t white pepper
¼ t cayenne
¼ t red pepper flakes
1 ½ t oregano
1 ½ t thyme
1 t basil
¼ t celery seed
1/8 t tumeric
¼ t kosher salt (optional)

In a medium bowl, mix together all ingredients until well combined.

Friday, February 17, 2012

Microwave Potato Chips

Oh no! I am all out of potato chips!!!! Whatever shall I do?

Run to the store? HA!
Go without? NEVER!

Make your own I say.

Say what? Wait, I know you are thinking, "How can she be serious.  Make potato chips?  Is this the same girl who is terrified of frying?"  Why yes in deed it is.  But this kicker with these chips is that you don't need to fry them.  They are baked.  And the best part is, they get baked in the microwave.
Yes, there is a recipe for microwave potato chips from all recipes. Who would have thunk it?

In a nutshell, here's what you need to do:
1. Wash your spud.  I left the skins on, cause I am lazy.
2. Cut the spud into slices as thin as you can get.  It really helps if you have a mandoline to do this. (I mandolin might help as well, but that has yet to be determined as I have no skill with stringed instruments.)
3. Toss the chips into a plastic bag with 1 T veg oil of your choice.
4. Spray your microwaveable plate with cooking spray.  (You only need to do this once.)
5, Place the slices on the plate in a single layer.
6. Nuke for 3-5 minutes until the chips are brown.  It is important that they get brown, or they won't be crispy.  My mandoline doesn't cut paper thin, so I cooked my chips for 5 minutes.
7. Carefully remove chips from the hot plate to cool.
8. Shake on salt or the seasoning of your choice.

I had two plates that I rotated through the microwave.  As one plate was cooking, I arranged more slices in a single layer on another plate.  This helped speed up the process quite a bit.

Aside from not burning myself or the potato, like I would if I fried the chips, or the long baking time and hunger induced crabby time that would have resulted from actually baking the whole potato in the oven, crockpot, or even the microwave, I felt like this was a pretty healthy way to eat a potato. Frying the potatoes would have me consuming much more than 1 T of oil.  And if I eat a baked potato, you'd better believe that I'd be using more than a Tablespoon of butter, not to mention sour cream and cheese.

So I ate this entire plate of chips for lunch one day and did not even feel like a piggy pig pig.  Aaaa-nd they tasted just like Baked Lays.  So there.

Go ahead and make these babies.  I give you permission to eat the whole spud yourself.

Thursday, February 16, 2012

2012 Thankful Thurs #7

1. Out of all my annoying habits, Blockette has chosen to mimic singing to, and about, inanimate objects.

2. I decided on a craft project to work on while my sewing machine is in the shop

3. I found the tracing paper I needed for said craft project after tearing apart the house for a good 20 minutes.

4. I was in the house alone while searching for the tracing paper.

5.Two weeks without a digestive problem is better than one week.

6. Pinterest.  (Oh how I love and hate you.)

7. Mrblocko made the bed this am. (Sometimes the little things can make your day.)

8. Helping out at church youth group.
9. Sweatpants

10. "Breaking" my best friend.  (It's funny when she pees herself.)

Wednesday, February 15, 2012

Crockpot Polish Hunter Stew

We ate this Polish Hunter Stew for dinner on the 100th day of school a few weeks ago.  Apparently the 100th day of school is still a big deal in first-graderland.  Dontcha love Blockette's stylin 100 crown?
Anyhow...let's talk about this soup.  I didn't particularly care for it.  I couldn't tell you why.  It just didn't do anything for me.  It could be because my back has been killing me and that makes me super duper crabby.  Or maybe I saw a bug.  Who knows.  Blockette liked it, provided she could pick out those icky mushrooms.  I didn't hear any complaints from Mrblocko.  However, they didn't rave about it either, so I don't think they will be too shook up if this soup doesn't grace the dinner table a second time.

Polish Hunter Soup adapted from 50+ Friends Club Cookbook
6 c. chicken/turkey stock/broth
1 can cream of mushroom soup
14 oz. sauerkraut, drained
8 oz. sliced mushrooms
2 med. potato, cubed
3 med. carrots, peeled and chopped
3 stalks celery, sliced (chop up the leafy bits too if you have any)
1 lb. polish sausage (mine was chicken sausage), cubed browned
2T  cider vinegar
2 tsp. dill
1/2 tsp. black pepper
1 onion minced caramelized

Saute your cut up sausage to bring out the sugars.  Once caramelized and browned, toss into the crockpot.  In the drippings from the sausage, (if any) saute the onion and mushrooms until caramelized, toss that into the crockpot too.  (You don't have to saute anything if you don't want to.  I just like the extra flavors it gives.)  Dump everything else in the crockpot.  Slap the lid on and cook on low 8-10 hrs, or 4-6 hours on high.

Tuesday, February 14, 2012

A Bear Holding a Heart

This is one of my favorite Saturday Night Live commercial parodies.  It cracks me up every time.
HAPPY VALENTINE'S DAY!!!

Monday, February 13, 2012

Chinese Style Turkey Meatballs

This was a fun twist on spaghetti and meatballs. The flavors of cilantro, sesame oil and soy sauce give the meatballs a distinct Asian flare.  I'd say that the meatballs taste a lot like the meat filling of a gyoza dumpling.  I love me some gyoza, or potstickers, but they can be a bit on the fussy side.  (Mine always stick to the pan, and not in a good way.) These meatballs were all the yummy without all the work.

We ate our meatballs with soba, Japanese buckwheat noodles, to follow through with the Asian theme.  I'm sure you could use regular thin spaghetti if you can't find or don't like soba.  We happen to love it, and our grocery store carries it in the Asian foods aisle.  Yay!

I really liked that these meatballs were baked and make from lean turkey.  A win win situation in my book. 

Blockette was rather indifferent towards the sauce.  I thought it had a good balance of salty, sweet and tangy.  I just dipped my meatballs one by one in the sauce, but Mrblocko poured the sauce over his entire dish. 
Chinese style turkey meatballs from Disney's Family.com
Meatballs:
1 pound ground turkey
2 scallions, very finely chopped
1/2 cup very finely chopped cilantro
1 tablespoon sesame oil
1 tablespoon vegetable oil
2 tablespoons soy sauce
1/2 cup fine, dry bread crumbs (unseasoned)
1 egg, lightly beaten


Sweet Soy Dipping Sauce:
1/4 cup brown sugar
1/4 cup soy sauce
1 tablespoon rice vinegar
2 or 3 slices fresh ginger smashed with the side of a heavy knife

To make the meatballs: Heat the oven to 400. Gently mix together the ingredients (hands are best for this), then form meatballs by rolling tablespoon-sized scoops between your palms. (I used a small cookie scoop) Arrange on a lightly oiled or parchment lined cookie sheet and bake for 20-25 minutes, until well-browned and cooked through.

To make the dipping sauce: In a small pot, stir all the ingredients together over medium-low heat until the sugar dissolves. Simmer 3 or so minutes, stirring frequently, until the sauce thickens a bit. Fish out the ginger and serve in small cups for dipping.

Friday, February 10, 2012

Dairy Free Chocolate Chip Cookies

The other day I wrote about those wonky lemon bars I made for our friend who can't eat dairy. As I was quite leery about their quality, I decided to make some chocolate chip cookies as a back up. I had seen this recipe for soft and chewy chocolate chip cookies from The Pastry Affair that uses all shortening instead of butter.  This seemed like the perfect opportunity to give the recipe a test drive.

I even got some special dairy free chocolate chips from Trader Joe's.  Which, by the way, don't taste too terribly bad.  I mean they're no Guittard or Ghirardelli, but loads better than no chocolate at all.

The cookies themselves were a lot softer than the standard Toll House cookie.  I assume this was due to the shortening, and the extra moisture from the molasses.

I had a hard time getting over the taste of the shortening in the cookie.  I'm just so used to the flavor that butter brings to a cookie.  Our friend was plenty pleased with the cookies as he had been going without chocolate chip cookies for some time.


Soft and Chewy Chocolate Chip Cookies from the Pastry Affair: makes about 3 dozen
3/4 c sugar
3/4 c brown sugar
1 c shortening
2 eggs
2 tsp vanilla 
2 T molasses
1 tsp baking soda
3/4 tsp salt
2 1/2 c flour
1 c semi-sweet chocolate chips (or more- I had a 12 oz bag of chips and I used about half the bag)

Preheat oven to 350 F. In a large mixing bowl, blend sugars. Cream sugars and shortening til light and fluffy. Add in eggs one at a time, mixing well between additions. Mix in vanilla and molasses.
In separate bowl, whisk baking soda, salt, and flour. Gradually add flour mix to batter. Stir in  chocolate chips. Scoop cookies onto baking sheet and bake 8-10 min, til top is lightly browned. Remove from oven and leave cookies on baking sheet for a few minutes so the cookies can set. (If you don't do this, your cookies WILL fall apart!) Transfer to a cooling rack to cool completely.

P.S.  These cookies are pretty spectacular made into a sandwich with some Biscoff Spread  smeared between them.  (Not that I would indulge in that sort of thing.) The Biscoff erases any hint of shortening flavor.  Oh and bonus,the Lotus brand Biscoff Spread surprisingly doesn't contain any dairy!

Thursday, February 9, 2012

2012 Thankful Thurs #6

1. A nice visit with my mom.

2. Blockette behaved herself while my mom was in town.

3. Two weeks with no digestive issues again.

4. Sending my sewing machine in to get cleaned.

5. Blockette is a still a great speller despite me helping her study for spelling tests.

6. Being silly with Blockette at the bus stop.

7. The tulips are sprouting.

8. Working hard to get out of my funk.

Wednesday, February 8, 2012

Lemon Squares

We had some friends over a while ago for lunch. One of them has recently discovered that he has a severe lactose intolerance. He happens to really like lemons so I thought these 2 ingredient lemon bars from Practically Living would make for a nice dessert.

The two ingredients in the recipe are angel food cake mix and lemon pie filling.  My grocery store carries three different brands of angel food cake: Pilsbury, Betty Crocker and the store brand.  Both the Pilsbury and Betty Crocker versions contain dairy, so my only choice was the store brand. 

I was a bit skeptical about this dessert as it had so many mixed reviews.  Half the people loved it, half the people hated it. I think we were somewhere in the middle.  It was ok, but there was something weird about the texture.

This was due to the fact that the bars never set up properly.  I baked them a full 10 minutes more than the recipe suggested.  The bars had begun to brown on the top, but when checked in the center with a toothpick, the toothpick came out coated with a pudding like consistency on it.  Mrblocko thought it might set up as it cooled, sort of like a cheesecake does.  He was wrong.


If you look at the part of the bar on the left of the picture it looks very gooey, but the right has an almost cake like appearance. I think this was due to the brand of cake mix.  I think the dairy in the cake must do something to help the cake cook evenly.  So, if you are going to attempt this recipe, use Pilsbury brand, like they did over at Practically Living. Her's look cakey and fluffy all over.


Two ingredient Lemon squares from Practically Living
Pilsbury Angel food cake mix
1 can of lemon pie filling

Mix together and bake in an ungreased 9x13 cake pan at 350Ffor 20 minutes. As they are cooling, you can sprinkle with powder sugar if you wish.

Tuesday, February 7, 2012

Salt Free Taco Seasoning

Like GIR, from Invader Zim, I loves me some tacos. (I love the little tacos. I love them good.)

Soooo...it was no big surprise when I noticed that we were precariously low on Taco seasoning. (NOOOOOOOOOOOOOOO!)  I like to make my own stuff as it is cheaper, tastes better and I can make it salt free. 

So I did a little search on here and...what?  No posts found.  Hmmm....so I went looking in my handy black recipe binder.  WHAT??  It wasn't there either. Uh oh.  What in the world did I do with the recipe?

Ugh.  It was back to square one on trying to find a good recipe.  After much searching, here is what I came up with:


Salt Free Taco Seasoning
4 parts chili powder*
4 parts paprika (I used half smoked and half regular)
2 parts cumin
2 parts cornstarch 
1 part cayenne (or more depending on your heat preference)
1 part oregano
1 part onion powder
1 part garlic powder
1 part cocoa powder
1/2 part coriander
1/2 part pepper (or more depending on your heat preference)** 

Mix everything up and store in an air tight container.  I like to use 3-4T for one pound of meat. 

*If you want this really spicy use ground chile (ancho or chipotle) powder which is much different than chili powder.  If you want this Taco seasoning to be salt free, make sure your Chili powder doesn't contain salt.  Most of them do.  You can make your own chili powder if your store doesn't sell the salt free kind.

**I used white pepper as it was the only stuff that was already ground, and I was lazy.

Monday, February 6, 2012

Pineapple Tarts for Chinese New Year

Yeah, Chinese New year was on Jan 23rd, but I've had a bit of a posting backlog.  I guess I'm just making things faster than I'm able to find time to write about them.  I often wonder if other bloggers, particularly those with a huge following, have a similar problem and they are just better at hiding it than I am.  Of course, I'm not really hiding it if I come right out and say I made these two weeks ago.

But let's get on to the good stuff...these pineapple tarts from Rasa Malayasia, or as Blockette likes to call them, Pineapple dumplings.  I'd never had these little cookie like tarts before, so I didn't know exactly how they were supposed to taste.  The original recipe made 24, but as I wasn't sure if they'd be good/I'd screw them up, so I halved the recipe and only made 12.  Why oh why did I do that? They turned out to be really tasty and I was kicking myself that I didn't have more!
This is a horrible picture of the pineapple tarts right from the oven.  Wow is the light in my kitchen ever rotten!
The exterior is like a soft slightly flaky crust.  It's not too flaky as I used butter and no shortening.  If you wanted a super flaky crust, I think using half shortening would be the thing to do.  Although, I think a super flaky exterior would make for a messy treat.

For the interior you basically make your own pineapple jam.  I used canned pineapple cause it was on sale at the store.  The fresh stuff also looked nasty in addition to being uber expensive. 
Pineapple jam filling inside the tiny tart.
The tarts are supposed to have little crisscross hash marks on them to imitate the lines on a real pineapple.  My dough did not want to come together.  It was super duper crumbly, so I added about 3T of milk.  I'm fairly certain that was 1 T of milk too much.  The dough then went the other way, and became too sticky.  I had a hard time making an impression in the tarts without having the dough stick to the fork.  I decided against adding some more dry ingredients just in case I over did that as well.  The dough wasn't perfect, but it was easier to work with than crumbly dough.

I'll definitely make these pineapple tarts again, but I'll just make sure to be a bit more careful adding additional liquid!

Pineapple tarts half recipe from Rasa Malaysia
For the pasty filling
1 1/2 ce flour
1 stick butter
1 egg yolk
2 T powdered sugar
1 T cornstarch
1 egg yolk (lightly beaten for egg wash)

For the pineapple filling
1 (20 oz) can sliced pineapples
5 T sugar (I think if you are using the pineapple with corn syrup 4T is plenty sweet)
1/2 t cornstarch  (mixed with 1/2 t water)

Drain pineapple slices and squeeze extra water/juice with hands. Blend pineapples til mushy. Using medium heat, cook pineapple and sugar until most liquid has evaporated, and filling turned golden. (My filling never changed color and I babysat the pesky thing for 30 min.)Stirring constantly using a wooden spoon to avoid burning. Taste, and add more sugar when needed. Add in cornstarch to thicken filling. Let it cool in the fridge.

Combine flour, cornstarch, salt and sugar into a medium bowl. Soften butter to room temp. Add in  egg yolk and flour. Knead to form dough. (I did this by hand but you could use a pastry blender if you wanted to.)

Divide dough into 12 equal rounds. (I had a few tablespoons of leftover pineapple filling.) Flatten pastry dough with your palms and put a tsp or so of pineapple filling in the middle and use the dough to cover the filling. Use your palms to round it up and then shape it into a roll about 1.5 inch long. Use a fork to make criss-cross patterns on the tart and then brush it with the egg wash.

Preheat the oven for 350F and bake for 20-25 minutes or until light brown.

Saturday, February 4, 2012

Patchy Pants Extravaganza

My daughter must walk around all day on her knees.  Does she even use her feet?  She must as she wore through a pair of shoes last month.  I was doing the laundry and noticed that she had worn holes in 3 pairs of pants.  THREE PAIRS! Ugh.

She can't stand to have holes in her clothes, so I try to at least make the patches fun.  She will wear the pants if they have fun patches.  Hmmm....I wonder how long that will last?  Maybe by the time she hates patches she will stop crawling around on the floor all day?

Apparently, everyone likes to sneak into the picture when I whip out the camera.
 The jeans on the left, probably look familiar.  I've patched and lengthened them before.  She finally wore through the other knee.  The fabric I used on each patch came from the same scrap piece of fabric.  It was sort of this tie dye fabric that had orange, green and purple on it. Why didn't I pick the purple part of the fabric for the patch?  Well I had orange thread, but had used up all the purple.  Blockette thought the orange was awesome, so it worked out great in the end.

The corduroys on the right have patches with silver glittery fabric paint.  This makes the patches extra stiff. Hopefully that means they will be extra sturdy.

The cords in the middle wound up being my favorites.  I've had this Zodiac fabric for ages and haven't had a clue what to do with it.  Blockette is a Virgo so I used that one for her patch. 


I think these might be Blockette's favorites too.  Blockette got a book on constellations for Christmas.  Already she can find Orion all by herself in the night sky!  So we got to talking about the Zodiac constellations and how her birthday fell into the Virgo time frame, and I was under Leo the Lion. 

Then she asked me, "But what is a Virgo?"  Not thinking anything of it, I replied, "Virgo is the virgin."  I mean we talk about how Mary was a virgin, so I wasn't expecting the follow up question of, "But what's a virgin?"  Oh man.  Talk about quick thinking.  I settled on the explanation of a "young lady who has never tried to make babies."  She was satisfied with that.  Whew!

Friday, February 3, 2012

BBQ Onion Rings and Burgers of Extreme Goodness

This summary is not available. Please click here to view the post.

Thursday, February 2, 2012

2012 Thankful Thurs #5

1. I figured out how to get the old blogger interface back.  (I hated the new Blogger interface.  If you Blogger big wigs are reading...the worst part was not being able to look at your posts in "edit posts" sorted by labels. That'd be great if you could fix that!)

2. Found a winter coat for Blockette for next year on clearance.  ($8!  What a steal!)

3. Singing in the car with Blockette.

4. Over all, Blockette is a good kid.

5. No one was injured when Blockette beaned another kid at school with her sandwich box.

6. A nice visit with friends.

7. I got my sewing machine to work, just long enough to do some mending.

8. Blockette didn't have a single timeout at the fabric store.

9. Pizza that wasn't frozen and I didn't have to make.

10. My celiac test came back negative!!!!  

Wednesday, February 1, 2012

January Reads

1.) Waterfall by Lisa T. Bergren.  This is the first book in a trilogy.  The story is a sort of "G" rated teen romance.  The main character, Gabriella, is in Italy with her sister and mother who is an archeologist studying the Etruscans.  Gabriella and her sister enter the Etruscan tomb that is unearthed and fall backward into the 14th century where she falls in love with a noble who is already betrothed.  Apparently this is supposed to be Christian Teen romance fiction.  I was surprised to read that because the mention of God seemed pretty sparse.  Maybe the main character's relationship with God is further developed in the 2nd and third books of the series.

2.) Ogre of Oglefort by Eva Ibbotson. A cute juvenile fiction book set in what seemed like an alternate post World War II England where ogres, hags and other sorts of magical creatures live and co-exist with regular folk.  This is one of those fairy tales where the princess only needs rescuing from those who are have ordered her to be rescuedt.  It had a nice ending that could have lent itself to a sequel, unfortunately, the author passed away in 2010.  Her writing style reminds me a bit of Roald Dahl.  I think I'll have to check out more by this author. 
From: Light and Shade
3.) Liesl and Po by Loren Oliver.  This was a really unusual work of juvenile fiction, especially considered it is for 3rd-7th graders.  A girl is locked away in the attic by her step mother after her father passes away.  She begins to be visited by Po, and his pet, spirits from the "other side".  Liesl's main goal is to take her father's ashes and bury them next to her mother's, but there is a mix up with some other magical ashes.  Now Liesl has more than just her stepmother searching for her. The story is quite dark and the concepts of loss might be a bit too deep for the younger set this book is target towards.  I found it helpful, and liked the book a lot more, when I read that the author had written this book as a way to cope with the loss of a close friend.  Definitely not a book to read when you are sad and gloomy.

4.)Tiger's Voyage by Colleen Houck.  This is the third book in the Tiger's curse series. The main character, Kelsey, is still torn between the two brothers, Kishan and Ren, who have been cursed to live as tigers.  In this book they complete another task, this one involving dragons.  I've enjoyed this G-rated teen romance series up until this point.  I find the writing style humorous, as it is similar to how I wrote as a young teenager, describing in great detail what everyone wore and ate.  I can see how this could eventually become too much of a distraction from the actual storyline.  What drove me nuts was Kelsey's indecision between the two brothers.  First she is in love with one, then no, wait, she is really in love with the other one.  No, is it a Tuesday? Then she is in love with the first one again.  Make up your mind already girlfriend.  I think there is one final book in the series. I'll read that one when it comes out (in the fall?) just to see who the main character winds up with.  Personally, if I were one of the brothers, once the curse was lifted, I'd pitch her for someone who didn't jerk me around.