Tuesday, July 31, 2012

Salsa Bean Dip

Our local library has a reading program every year over the summer. The kids have to read a certain number and type of books to complete each part of the program. This year the theme was "Reading is Delicious" and one of the activities for Blockette's age group was to check out a cook book and make a recipe with the help of an adult.

One of the cook books we checked out was called American Grub, by Lynn Kuntz.  Each state had one or two recipes based off of something related to the state.  The book also had a little blurb about each state which I thought was fun too.

The recipe that caught my eye was the Anasazi Bean Dip. While I really like my go to recipe for Pesto Bean Dip, I get tired of it after a while and want to try something new.

I thought this bean dip was pretty good, and so did Mrblocko.  It's more of a chip bean dip, than a veggie bean dip, but we still ate it with veggies.  Blockette has decided that she doesn't like the new bean dip and has decided she'd rather eat her veggies plain until I make the pesto dip again.  I'm not sure if this is because she doesn't like the taste of the dip, or she doesn't like change.  Probably a little bit of both.

If you'd like to try this tasty bean dip here's the version of the recipe I made:
Anasazi Bean Dip adapted from American Grub by Lynn Kuntz
2 cups of cooked pinto beans
1 medium onion, coarsely chopped
1/2 tsp garlic powder
1/2 tsp cumin
1/4 tsp each salt and pepper (use more or less to taste)
1/2 c sour cream
1/2 c salsa

In a food processor, pulse beans.  Add onions and pulse.  Add spices and puree til mostly smooth.  Pour mixture into a bowl and add sour cream and salsa.  Stir until combined.  Let chill in the fridge for at least an hour to let the flavors combine.

Monday, July 30, 2012

Banana Bread Waffles

With the weather being so insanely hot for such an extended period of time, we've found that our bananas are ripening at an accelerated speed. I try to buy the greenest bananas they have at the store, but still they are black by the end of the week. So I peel them and freeze them and try to find a use for them.

There are two things I usually make with bananas: banana bread and banana pops. The popsicles would seem like the obvious choice with how hot it has been this summer. However, Blockette has not been into eating popsicles lately so all the popsicle molds are still full. And as for the banana bread, I just don't feel like turning on the oven if I don't have to.

So I went on a quest to find a way to use up my growing store of frozen over ripe bananas. I came across a few different recipes for Banana bread waffles, but settled on the one from Willow Bird Baking simply because it called for three bananas instead of two.

I made a few minor changes to the recipe (not listed below).  I had some vanilla Light n fit yogurt so I used that instead of the buttermilk.  As there was quite a bit of sugar in the yogurt already, I omitted the 2 T of sugar as well.  My batter was super thick, so instead of adding 1/4 c of milk, I added 1/2 c. The batter was still very very thick.  I also only used 1/2 c of chopped walnuts.  In place of the other 1/4 c walnuts, I swapped in 1/4c chopped cinnamon baking chips.

I don't know if it was the cinnamon chips, but the waffles really wanted to stick to the iron.  I found that if I sprayed the top and bottom plates of the iron after every other waffle, that eliminated the problem.

We ate our waffles with homemade syrup and strawberries.  I'm not normally one for fruit on my waffles, but this was a really great flavor combination. 

Banana bread waffles from Willow Bird Baking (This recipe made 13 waffles in my round standard waffle iron.)
2 cups all-purpose flour
1/2 teaspoon salt
2 tablespoons sugar
1 1/2 teaspoons baking soda
1 teaspoon cinnamon
1 3/4 cups buttermilk* or 1 1/2 cups sour cream or plain yogurt thinned with 1/4 cup milk
2 eggs, separated
4 tablespoons (1/2 stick butter, melted and cooled)
1/2 teaspoon vanilla extract
3 ripe bananas, mashed
3/4 cup walnuts, chopped

Combine the flour, salt, sugar, baking soda, and cinnamon. Mix together the buttermilk (or buttermilk substitute) and the egg yolks. Stir in the butter, mashed banana, and vanilla.

Spray the waffle iron lightly with oil and preheat it. Stir the wet into the dry ingredients. Beat the egg whites in a separate bowl with a whisk or electric mixer (make sure bowl and mixer are spotlessly clean) until they hold soft peaks. Stir them gently into the batter. Stir gently to combine.

Spread a ladleful or so of batter onto the waffle iron and bake until the waffle is done, usually 3 to 5 minutes, depending on your iron.

* The buttermilk can be substituted with 1 1/4 cups of milk at room temperature, mixed with two tablespoons white vinegar, left to clabber for 10 minutes.

Friday, July 27, 2012

Penzeys Vegan Chocolate Cake

I made this Vegan Cake for a gathering early in July. One of the people I knew would be there was a vegan so I made this dessert with him in mind.  This cake was one of the few times I used my oven for more than 20 min this summer.
Look at those poor lonely leftovers.  They should get in my belly.
Little did I know how awesome this cake was going to taste.  I don't know why I was so surprised.  I found the recipe in the Penzeys Spice Catalog.   Their recipes have yet to disappoint. 

I think the key to this recipe is using good quality cocoa powder.  Yes, I am a cocoa powder snob.  I really like the Penzeys' brand of cocoa.  I can guarantee this cake won't taste nearly as good if you use Hershey's Cocoa powder.  I think it has something to do with the amount of cocoa butter in the cocoa powder.  I've also found, after using high quality cocoa powder, that even after sifting, the Hershey's brand results in a gritty, grainy baked product. 

The cake is very moist and velvety.  The texture of the cake in your mouth is very smooth.  I was surprised that I liked it so much as I'm more of a fudgey brownie kind of girl.  But this cake is nothing like a cake-y brownie.  It's much too moist for that. I mean I really like brownies, but sometimes they are so dry and crumbly.  The "crumbs" of this cake easily stick to your fork.  The cake is also very rich.  A "wedding cake" size slice was very satisfying.  I suppose you could eat a larger slice, but you'd need a big ole glass of milk to wash it down.

Another surprise was that the cake was not oily.  Sometimes I find that cakes with a lot of oil are greasy.  I have had cakes that used the same amount of oil as this recipe and they were so oily that I thought I could wring the cake out and fry up some potatoes.  Luckily, that was not the case with this cake.
 
I'm also a bit of a frosting glutton.  I like a nice thick layer of frosting.  This recipe does not yield a thick frosting.  However, it really doesn't need it!  Yet another surprise!  While the frosting is thinner than I would put on a standard cake, it is smooth and rich as well.  It turned out to be the perfect amount for the sheet cake.

As it has been so hot, the frosting never fully set up.  I think this could be remedied by using coconut oil instead of vegetable oil. 

I just tried to keep the cake chilled to prevent the icing from sliding off.  It was only at the end of the party where the frosting got a bit more viscous than it should have been.  Mrblocko and I thought the cake tasted better right from the fridge anyway.  The cake was moist enough to not get dried out from doing this either. Of course...the leftovers only lasted a day so I don't know how long the cake would remain moist.

Vegan Chocolate Cake from Penzeys Spices
3 C flour
2 C sugar
2 tsp. salt
2 tsp. baking soda
6 T Cocoa powder
2/3 C vegetable oil
2 T vinegar
2 tsp. Vanilla
2 C water

Icing:
4 T oil
4 T water
6 T sifted COCOA POWDER
2 C sifted powdered sugar

Preheat oven to 350°. Grease and flour a 9x13 pan. In a mixing bowl, sift together the flour, sugar, salt, baking soda and COCOA. In a second bowl, combine the oil, vinegar, VANILLA and water. Gradually add the dry ingredients to the wet and mix well. Pour into the pan and bake at 350° until the cake is firm in the center and begins to pull away from pan, about 35-40 minutes.

Icing: Using a double boiler or a metal bowl placed over a pot of boiling water, heat the water and oil to boiling (it will not come to a rolling boil, but bubbles will appear). You may also use a heavy-bottomed, medium saucepan, in which the mixture will come to a rolling boil. Remove from heat. Blend in the COCOA and sugar. Beat until smooth. Pour over the cake, spreading the icing to the edges, and let it cool. The frosting may stick to the knife when cutting the cake, so dip the knife in warm water and wipe clean after each cut.

Thursday, July 26, 2012

Thankful Thurs #30

1. No one was hurt in the cutting down of massive branches.

2. We did not knock down the neighbor's fence in said tree trimming...although we came close.

3. The blade from the pole saw that got stuck in one branch, fell down with the big storm.

4. We got a big storm!  (Can I get an AMEN to the rain?)

5. I ordered both a Roma and a regular tomato plant from Blockette's school fundraiser. (They were labeled incorrectly.)

6. Air conditioning...Lots of people are without theirs because of the big storm and it's 100 billion degrees out again.

7. No one was hurt when the tree fell on my husband's best friend's house.

8. Coloring with Blockette.  (There's so many neat pictures on the interwebs!  Check out my pinboard for some of my favorites.)

9. Teaching Blockette how to play Egyptian War.

Wednesday, July 25, 2012

Pina Colada Sorbet

Ugh. I made this sorbet at the beginning of the summer and somehow forgot to write about it.
The recipe for this pina colada sorbet is from Back to Her Roots.  Well at least the original is.  Of course I switched the recipe up a bit.

I had made my own coconut milk with a recipe I found over at Whole New Mom.  That didn't work too well as I have a sad wimpy blender.  I don't recommend doing this unless you have a good blender.  A bad blender will give you chunky coconut milk.  It turns out chunky coconut milk isn't so bad in sorbet.  It's really not the best on your breakfast cereal though. 

Another downside to poorly made coconut milk vs the canned stuff you can buy at the store is the consistency.  Mine was quite thin and that canned stuff is so thick and creamy.  Using the canned stuff would probably have resulted in a creamier sorbet.

The last change I made to the recipe was to add some booze.  I had some Malibu so why not!  More coconut-y goodness right?  Besides, the alcohol helps prevent the frozen mixture from getting as hard as a brick.  Well, it's supposed to anyhow.  I think I needed a full cup of the Malibu, not just 1/4 c.  I'll try that out next time.

Pina Colada Sorbet adapted from Back to her Roots
1 cup sugar
1/2 cup water
1/4 c Malibu (I'll use 1 cup next time)
1-20 ounce can crushed pineapple (I used chunked pineapple as it was going into the blender anyhow)
1-13.5 ounce can coconut milk (13 oz home made coconut milk, strained)
1/4 cup lime juice (this was exactly the juice of 1 lime)
1 teaspoon vanilla

combine the sugar, water and booze in a small saucepan.  Boil on med heat for about 3 minutes.  Set aside to cool. In a blender add pineapple, coconut milk, lime juice and vanilla.  Blend until smooth and frothy.  Transfer to a bowl and whisk in boozy syrup. Cover and chill in the fridge for 3 hours.  Once the mixture is completely cool, add to your ice cream maker per manufacture's instructions.  

Tuesday, July 24, 2012

Pizza Casserole

We really like this pizza casserole from Mom Endeavors. I made it once for a potluck dinner at church and then this half recipe a few weeks later. 

What I like about this recipe is how easy and customizable the recipe is.  Toss in whatever you prefer on your pizza.  The photo below is a half recipe with pepperoni all over, and black and green olives on one side.


Here's what you need to make a full recipe of pizza casserole:
1 box of pasta (I've used penne and bowtie)
1-2 jars of pasta (I used just over 1 jar, mostly because I had an almost empty jar in the fridge)
3 cups of Italian blend shredded cheese
Toppings of your choice

Preheat oven to 350.  Cook your pasta to al dente, and drain.  Spray 9x13" pan with cooking spray.  Spread a thin layer of sauce on the bottom of the pan.  Spread out half the noodles over the sauce layer.  Then add half the pizza toppings in another layer.  Add slightly less than half the cheese.  Repeat the layers of sauce, noodles, toppings and cheese.  Bake 30-40 min until warmed all the way through.  If you are crazy and don't like browned cheese cover the dish with foil.  I like to let my dish sit for 15 min before slicing so it holds together a bit better, but it's not necessary.

Monday, July 23, 2012

BBQ Turkey Burgers

Are you getting tired of burgers midway through the summer? We usually have them at least once a week and sometimes I just want something different.
This time I made BBQ Chicken burgers from Tracy's Culinary Adventures. They were pretty good as far as ground poultry burgers go.  I do prefer beef burgers, but turkey was a nice change.  I think that what was tripping me up was the grit from the cornmeal.  I used the fine ground stuff, but occasionally I'd get this sandy texture.  I bet if I crumbled up some cornbread muffins I'd still get the flavorful filler without the grit.

Barbecue Chicken Burgers from Tracy's Culinary Adventures
1/4 cup cornmeal
1 scallion, minced
1 tablespoon minced fresh parsley
1/2 teaspoon paprika
1/4 teaspoon garlic powder
1 teaspoon dry mustard
1/2 teaspoon kosher salt
pinch cayenne pepper
2 teaspoons light brown sugar
5 tablespoons barbecue sauce, divided
1 lb ground chicken (I used ground turkey)

Add the cornmeal, scallion, parsley, paprika, garlic powder, dry mustard, kosher salt, pepper, brown sugar and 2 tablespoons of the barbecue sauce to a medium bowl. Stir to combine. Add the ground chicken and use your hands to gently mix the ingredients together until incorporated. Set aside the remaining 3 tablespoons of barbecue for brushing the burgers as they cook.

Divide the chicken mixture into 4 equal portions, and shape each into a patty. Put the burgers on a plate, cover with plastic wrap and refrigerate for at least 30 minutes.

Set a grill pan over medium to medium-high heat. Spray the pan with nonstick cooking spray. Put the burgers on the pan, and cook for 3-4 minutes on the first side. Flip the burgers and brush the top (cooked side) with some of the reserved barbecue sauce. Cook for about 3 minutes on the second side then flip once more and brush the other side with the remainder of the reserved sauce. Add the cheese (if using), and allow it to melt. (These cooking times are an estimate - you're looking for a final internal temperature of 165 F - avoid overcooking or the burger will be dry.)

Makes 4 burgers

Friday, July 20, 2012

Tamale Casserole

Back when I was in High School, there was this restaurant in Minneapolis called El Mason.  They featured food from the Dominican Republic and it was awesome.  Sure my best friend wanted to go there because she was in LUUUUVE with one of the waiters.  Who cares that he was probably twice her age. 

Anyhow, the food there was amazing.  They had the best tamales and tostones ever.  I don't even remember what made them so awesome.  I do know that every other tamale I've had since then has been dry and gross.

This tamale casserole from Buns in My Oven was neither dry nor gross.  Nor was it anything like the tamales I had as a teenager.  But it was sooo good none the less.
Blockette said it was too spicy at first. And that she did NOT like it. Hated it in fact.

I told her that was too bad because we had another meal of leftovers and she could eat it or go hungry.  After much convincing I told her it would be a whole lot less spicy if she had just a tiny eensy weensy bit of sour cream.  GUESS WHAT?  I was right.  Now she LOVES the tamale casserole and asked me to make it again. 


Tamale Casserole from Buns in my Oven
4 ounces Cheddar cheese, grated
4 ounces Monterey Jack or Pepper Jack cheese, grated
1/3 cup milk
1 egg
1 teaspoon ground cumin
1/8 teaspoon ground red pepper
1 (14 3/4-ounce) can cream-style corn
1 (8.5-ounce) box corn muffin mix (Jiffy works great)
1 (4-ounce) can chopped green chiles
1 (10-ounce) can red enchilada sauce
1 pound ground meat (I used beef, but chicken or turkey would be great too)

Preheat oven to 400F. Spray 13x9 baking dish with cooking spray. Combine cheeses in a small bowl.
In a large bowl, stir 1/4 c combined cheese, milk, egg, cumin, red pepper, corn, muffin mix, and the green chiles. Stir until just combined. Pour into pan and bake 15 min or until just set.

While cornbread baking, cook meat over med heat until cooked completely through. Drain, if necessary.

Remove cornbread from oven and pierce all over with a fork. Pour enchilada sauce over corn bread.
Top with meat and remaining cheese. Return to oven for another 15 min.

P.S.  Sadly El Mason has changed ownership since my days of frequent patronage, and their menu.  Aside from being way more expensive, it seems tamales are no longer one of their offerings.  Harrumph!

Thursday, July 19, 2012

Thankful Thurs # 29

1. Lesson learned about growing Cauliflower - never do that again.

2. Remembering to pray.

3. Staying calm.

4. Temps lower than 90F.

5. RAIN!  (Thanks for sending it our way mom!)

6. Mrblocko loves the tomatoes from the garden.

7. Finally going and getting my license renewed.

8. Going out with the girls.

9. Starting a medium largish cross stitch design (ack my poor hands.)

10. The computer game reward system seems to be working better than anything else this summer.

11. The fun of reading the last part of the last Harry Potter book to Blockette.  (She can't believe what's happening!)

Wednesday, July 18, 2012

Morning Glory Muffins

We liked these morning glory muffins, from Eat Your Vegetables, so much that I've made them twice already!
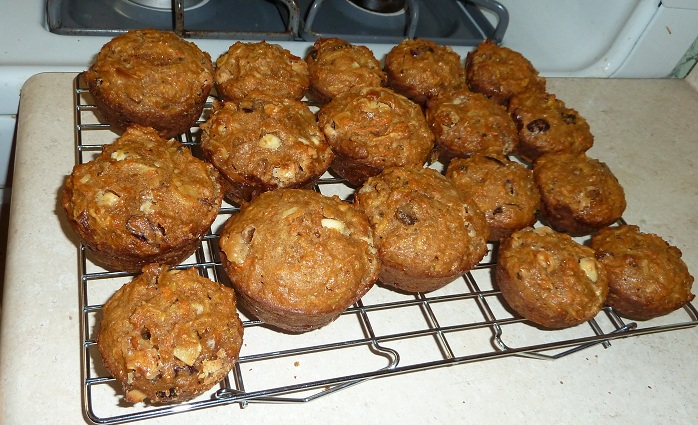
As you can see in the above photo, I made some in a regular muffin tin, and some in a jumbo muffin tin.  I think I prefer the jumbo ones!

These babies are loaded with all kinds of goodies: almonds, pecans, apples, carrots, raisins, craisins, and coconut, just to name a few!  I like to pretend they are healthy. Veggies and Fruit = healthy right?  At least they are healthier than a bowl of Fruit Loops or a cinnamon roll.

Because they have so many add ins, they are a very dense muffin.  They rose hardly at all.  They weren't so heavy that you felt like eating a brick though.  Just keep in mind that they are not a light fluffy breakfast pastry.  These babies are substantial and will fill you up.

Now this could be because I added more things than the recipe suggested.  First I used 1/2 c of coconut pulp instead of coconut flakes.  I had made some coconut milk for Mrblocko when he couldn't have dairy.  Our blender isn't too spiffy, so I had to strain out the chunks.  I didn't want to pitch them, so I tossed them into the batter.  I thought I'd miss the coconut texture, so I added a handful of shredded coconut as well.

Next, I added 1/2 c pecans.  Sure the recipe already had almonds, but I thought it needed pecans too. You couldn't really taste the almonds, but the flavor of the pecans jumps right out at you.

I didn't have enough dried cranberries so I used 1/4 c cranberries and 1/4 c raisins.  They were a nice mix of flavors.  I'm sure you could use all raisins if you wanted as well.  I bet golden raisins would be particularly tasty.

Finally, I added 1/2 c white chocolate chips.  Because, well...just because.  I had some and thought they would be tasty.  As this recipe made 12 jumbo muffins (or 24 regular size muffins) there were only a few chips per muffin.  This was just enough to give the muffins that little extra flavor boost.  Not that they needed it.  But seriously, why not go over the top if you can?!

Morning Glory Muffins adapted from Eat Your Vegetables
1/2 c (3 ounces) dried cranberries, rehydrated in hot water and drained (or any combo of dried fruit to equal 1/2 c)
1/2 c white chips
2 c (8 1/2 ounces) all-purpose flour
1 c (7 ounces) sugar
2 t baking soda
2 t cinnamon
1 t ginger
1/2 t salt
2 c (7 ounces) peeled and grated carrots (Use a food processor if you have one)
1 large tart apple (6-7 ounces), grated
1/2 c coconut pulp and a handful of shredded coconut(or a heaping 1/2 c shredded coconut)
1/2 c (2 ounces) sliced almonds
1/2 c pecans
1/3 c (1 1/2 ounces) wheat germ (I used wheat bran)
4 1/2 t ener-g egg replacer whisked with 6 T water (or 3 eggs)
2/3 c vegetable oil (I have used half veg oil and half olive oil with no olive oil taste.  you can also replace half the oil with applesauce)
2 t vanilla

Preheat oven to 375 and lightly grease 12 large muffin cups (or 24 reg muffin cups).

In a large bowl, whisk flour, sugar, baking soda, spices, and salt. Add carrots, apple, coconut, nuts, and wheat germ.

In a separate bowl, whisk eggs or egg replacer/water, oil, and vanilla together. Add to flour mixture and stir until evenly combined. Fold cranberries and chips into batter.

Divide batter among cups and bake 20-25 minutes, until golden brown. Let cool in pans for 5 minutes, then transfer to a rack to finish cooling.

Tuesday, July 17, 2012

Crockpot Pineapple Chicken Enchiladas

Ah finally...enchilada success.
After my last two enchiladas were massive failures (see here and here), I was a bit leery to try a new recipe.  Even Mrblocko shuttered a bit when I told him he was bringing enchiladas to work with him for dinner.    I had to reassure him that this batch was actually really really good!

I made a few very minor changes to the recipe which gave me an insane amount of filling!  First, the chicken breasts were huge.  I'm guessing 4 would have been enough to equal 6 non mutant chicken breasts.  Next, I added a cup of cooked pinto beans, along with 1 1/2 c of cooked quinoa.  I really wanted to bump up the protein in this dish.  Finally, I added a few seasonings, which obviously didn't increase the volume of the dish to anything measurable, but I just felt like mentioning it.

With all those add ins, the pineapple flavor really got lost.  Next time I think I will add a can of crushed pineapple, and a drained can of pineapple chunks.  I bet a can of green chilies would be tasty too.

Pineapple Chicken Burritos adapted from Real Mom Kitchen
6 fresh or frozen chicken breasts
1-2 (20-ounce) cans crushed pineapple, drained (I didn't do this. If I make this with 2 cans of pineapple, I will drain them)
2 (15-ounce) cans black beans, rinsed and drained (I used 3 cups)
1 c cooked pinto beans
2 cups medium salsa (needs to be medium or it will be too bland)
2t cumin
1 t each: onion and garlic powder
2-3 cups cooked rice
1 1/2 c cooked quinoa
10-12 burrito sized flour tortillas
1-2  (10 oz) cans green enchilada sauce
1-2 cups shredded cheddar/Monterrey jack blend (I used pepper jack)

Place the chicken in the crock pot and top with the ingredients up to, but not including the cooked rice. Cook on low for 6 to 8 hours. Remove the chicken and shred. Mix the chicken back into the crock pot with the rest of the ingredients. Mix in the cooked rice and quinoa.

I filled 8 regular sized tortillas with 1/3 c each of filling. Allow the remaining mixture to cool.Place the filled burritos in a 9×13 pan. Pour 1 can of the green enchilada sauce over the burritos, or more if you like it that way. Top with 1-2 cups shredded cheese and place under the broiler on the middle rack until the cheese is nice and melted.

With the remain cooled filling mixture, place it in a gallon sized freezer bag and freeze for another meal. (I measured out 8 third cup portions and placed them in freezer bags. I had enough for 3 more casseroles.) You can also place the remaining tortillas and shredded cheese in separate freezer bags to freeze along with the mixture for a future meal if you would like. To use the frozen meal, thaw the filling, tortillas and cheese and reheat the filling mixture.

Monday, July 16, 2012

Pinterest Fact or Fiction: episode 3

I'm always very curious when I hear about these amazing super cleaning tips and tricks on Pinterest.  Sometimes they just seem too good to be true.

 I tried the DIY drain unclogger.  That was a mega fail.  Then again, it WAS a mega drain blockage that the plumber had to cut away part of the pipe to remove.  I have heard others try this vinegar and baking soda technique with very little success.  So I'm going to call that one a pinterest myth.

Then I tried the DIY silver jewelry cleaner.  Oh and yay verily, it rocked mine little world.  There's nothing like being able to wear your favorite jewelry you thought was ruined.  A huge mega success if there ever was one.

As I currently have a 50/50 success rate, I figured giving the stainless steal de-gunker tip from Tales and Tips from A Real-Life Housewife was worth a shot.  The tip is to take a few tablespoons of Cream of Tartar and mix it with a few drops of water to make a paste.  Then you just scrub away.

Here is what I had to work with:

One nasty gross looking tea kettle.  That oily gunk wouldn't come off even with extra elbow grease from Mrblocko.   EW!

Here is the after:
Well...the cream of tartar paste DID get the oily gunk off.  But it did nothing for what I guess is rust?

I'd have to say this was a pinterest fact.  The tip didn't say anything about rusty stains, just greasy ones. 

Now all I have to do is figure out how to get rid of the rust on the tea kettle!  Please let me know your suggestions.  I love this kettle and am sick of how gross it looks!

Friday, July 13, 2012

Thankful Thurs #28

1. I didn't scream when I saw the gigantic centipede crawl into my shorts.

2. My husband understands that a bug in your pants is way grosser than your child puking on you when they have the flu.

3. Being able to turn the air off for a little while.

4. The things that seem so exasperating now, will most likely seem humors in the passing of time.

5. Evening walks.

6. Reading together.

7. I didn't discover the dead chipmunk in the garage.

8. Only 5 1/2 weeks until school starts up again.

Golden Oreo Blondies

I've been on a such a roll, that I was bound to screw up sooner or later.  Finally, I forgot to take a picture of something I made.

What a shame, because these Golden Oreo Cake Batter Blondies from Sally's Baking Addiction were super delicious!

They were so rich though.  Maybe a bit too rich.

Yeah.  I'm not one to think that something is overly rich or overly sweet.  I like me some sugar.  But these bars, if I ate more than one, I started to feel sick.  I even cut these bars super small.  I think I got about 24 pieces out of a 8x8 pan.

As much as I LOVED these bars, I don't plan on making them again.  They were too much of a temptation!  Even thought I knew I would feel all over sugared and wonky, I couldn't stop eating them.  Guess I'll just eat my Oreos plain.  Oh shucky darn!

Golden Oreo Cake Batter Blondies from Sally's Baking Addiction
1 box yellow cake mix
1/4 cup oil
1 egg
1/3 -1/2 cup milk
1/2 cup sprinkles
1 1/2 cups chopped Golden Oreos (reserve a handful to sprinkle on top)

Preheat oven to 350 F. Combine first four ingredients in a large bowl. Add milk slowly. You want the batter to be as dense and thick as possible. Fold in chopped Golden Oreo pieces and sprinkles.
Pour into 8x8 pan, sprinkle a few more sprinkles and crushed Oreos on top. Bake 25-30 min until edges are just turning brown. The blondies will look like they are not fully done because the center will be quite gooey, but that’s what you want! Cool at least 30 min so the center sets, before cutting into squares with a serrated knife.

Wednesday, July 11, 2012

Crockpot Coconut Beans and Rice Fail

It's funny what some people consider to be a failure. Technically, this dish was a total flop...or was it?

I found the recipe for coconut beans and rice over at A Year of Slow Cooking.  I made the huge mistake of not reading ALL the comments before preparing this dish.  Apparently, loads of other people had trouble with their rice turning into a huge gelatinous mass.

See. the recipe says to cook the dish on low for 8-10 hours.  My crockpot runs on the cool side so I thought I'd have no problem with that long of a cook time.  NOPE!  My rice was fully cooked after 3 hours.  I thought, well the recipe says it needs 8-10 hours, it couldn't possibly be done in 3.   So what did I do?  I ignored it for the next 5 hours. 

The result?  Imagine a really stiff oatmeal. That was basically the texture of the rice.

While I did add twice the amount of beans, I also boiled them for 40 minutes instead of the suggested 10 minutes.  (Red beans have a really tough skin and I wanted to make sure it got nice and soft.)  I also added 1 lb of precooked sausage links, sliced into half moons.  Neither of these additions I would think would make the rice so mushy.  It HAD to have been the excessive cook time. 

The weirdest thing about this dish?
Blockette loved it.

And by loved, I mean LOVED.

She asked for leftovers for lunch and dinner every day.  EVERYDAY people!

The child that hates beans loves overcooked beans and rice.

I guess when you are a toothless wonder, mushy food is your best friend.

It's for this reason that I can't say the dish was a total fail. When your kid likes something so much, and you don't is it a fail? Probably not. The fact that Blockette enjoyed the dish so much was pretty awesome, even if I did think it was not so wonderful.

I'm not sure if I will attempt to make this again.  Mrblocko hated it so much, and I wasn't too keen on it either.  It is a great way to stretch a buck.  I have to admit I am curious about how the dish would taste if it wasn't over cooked.  If I do give this recipe another try, I'll probably just make the dish on the stove.

Crockpot beans and rice from A Year of Slow Cooking
1 cup dried small red beans (soaked overnight, then boiled for 10 minutes)
1 large onion, finely diced
2 cloves garlic, minced
1 tsp red pepper flakes (I used a scant 1/2 tsp)
1 (14.5-ounce) can coconut milk (full fat is best. if you prefer to not use full-fat, add a drop or two of coconut extract to intensify the flavor)
3 cups chicken broth
1 1/2 cups long grain basmati white rice
1/2 teaspoon kosher salt
1 lb precooked sausage cut into half moons (optional)
2 limes, cut in wedges (optional)

Use a 4-quart slow cooker. Sort beans, and soak overnight in a bunch of water. In the morning, drain the water and dump the beans into a large pot of fresh water. Boil rapidly on the stovetop for at least 10 minutes before draining and putting into your crockpot.

Red beans MUST be boiled on the stove before added to the slow cooker to kill a possible toxin that occurs naturally.

Add onion, garlic, and red pepper flakes. Pour in the whole can of coconut milk (the creamy stuff, too), and chicken broth. Stir in sausage, raw rice and kosher salt. Cover and cook on low for 8-10 hours, (or 3 hours if you don't want a gooey gelatinous mass of goo) or until beans are bite tender. Before eating, squeeze on a bit of lime juice for a fun tropical twist.

Tuesday, July 10, 2012

Syrup AND Waffles from Scratch

I made my own fake maple syrup ya'll! (Apparently, making syrup gives me a southern accent.)
It turns out, whipping up a batch of syrup is insanely easy.  Just dump the ingredients in a pan and bring it to a boil.  Ding, fries are syrup is done!

Mrblocko claims that this syrup is infinitely better than the talking lady bottle, or the stuff from a wooden home structure.  The flavor is much richer for sure.  Oh, and the color of the syrup is this wonderful dark brown.  Why on earth do they need to add all those fake coloring chemicals?  Why people? Why?

Now I'm sure there are some of you saying, well that's pure sugar!  Um, what do you think that stuff in the grocery store is?  Or the real stuff that oozes out of tree?  You're not meant to drink it by the tumbler full three times a day.  Just use it in moderation and all will be hunky dory.  Well, unless you're diabetic.

Since I couldn't very well eat the syrup plain, I tested out the recipe for nutmeg waffles from Taste of Home.  The waffles tasted great, but the recipe made just enough for the three of us.  The recipe says it feeds four, but they lied. Next time I make this recipe I will make a double batch.

Basic pancake syrup adapted from food.com
1 1/4 c br sug
1/2 c sug
3/4 c cornsyrup
1-1 1/2 c water (depending on how thin you like your syrup.  We like ours thin so I used 1 1/2 c water)
1/2 t vanilla
1/2 t maple flavor
1/4 scant t almond

Dump everything in a pan and boil 3 min. Pour over waffles, or pancakes, if you are freaky like that.


Nutmeg waffles from Taste of Home - serves 3
1-1/4 c all-purpose flour
1 tsp baking powder
1 tsp cinnamon
1/2 tsp salt
1/2 tsp nutmeg
1/4 tsp baking soda
1 egg, lightly beaten
1 cup  milk
1 tsp canola oil
1 tsp vanilla

In a small bowl, combine flour, baking powder, cinnamon, salt, nutmeg and baking soda. In another bowl, combine egg, milk, oil and vanilla; stir into dry ingredients until smooth. Bake in a preheated waffle iron according to manufacturer's directions until golden brown.

Monday, July 9, 2012

Beer Burgers

Just a short post today about these spicy beer burgers from about.com.
They were really nice and moist, and tasted pretty good.  I think they would have knocked my socks off if we had used a beer I actually liked.  However, the only beer we had in the house was this stuff leftover from Christmas called Noche Buena, that I think smells horrible.  So my lesson for today is: unless you want a mediocre burger, use a beer you really like.


Beer Burgers adapted slightly from about.com
1.5 lb 80/20 gr beef
1 egg
1 sm onion minced
2 cloves garlic, minced
1/3-1/2 c bread crumbs
half a beer
scant 1 T Worcestershire sauce
1/4 t cayenne
1/2 t smoked paprika
1/2 T prepared mustard
 salt and pepper to taste

Combine meat, onions, garlic, eggs, bread crumbs, Worcestershire sauce, beer, and seasonings in a large bowl. Shape mixture into patties about 3/4 of an inch thick. Preheat grill for medium heat. Place patties onto grill rack and cook for 7-9 minutes per side.

Friday, July 6, 2012

It's a good thing we like potato soup

I decided to make scalloped potatoes and ham from Pioneer Woman with the remainder of our

MMMMM! Doesn't that look scrumptious?

Except for one thing...
Yeah. That's not supposed to be like that.

I guess it's my fault that the dish turned out so soupy.  I used skim milk and evaporated milk instead of cream and half and half.  Apparently, the fat in the dairy was essential in getting the darn thing to set up.

Oh well.

The main thing was that it tasted amazing.  Ah. May. Zing.  Soupy soup and all.  I'll be making this again the next time we have leftover ham.  And maybe, just maybe I'll actually use cream and half and half!

Scalloped Potatoes and Ham from Tasty Kitchen
3 pounds Russet Or Yukon Gold Potatoes, Washed Thoroughly
2 Tablespoons Butter
1 whole Yellow Onion, Diced
3 cups Diced Ham
1½ cup Half-and-half
1½ cup Heavy Cream
¼ cups Flour
Black Pepper To Taste
1 cup Grated Cheddar Cheese
1 cup Grated Monterey Jack Cheese
Chopped Parsley (optional)

Preheat oven to 350 degrees. Butter a large casserole dish.Heat 2 T butter in a large skillet. Add onions and cook 1-2 min, til translucent. Add ham, cook 3-4 min until thoroughly heated. Remove from heat and set aside.

Combine half-and-half and cream in a microwave-safe container and nuke for a minute or so, until no longer cold. Whisk in flour and black pepper until totally combined. Set aside. (You may add salt, but cheese and ham are salty, so add sparingly.)

Combine the two grated cheeses. Set aside.

Using a mandoline or slicer, slice potatoes into 1/8"slices (very thin.) Layer 1/3  potato slices in prepared dish. Sprinkle 1/3 ham/onion mix, then 1/3 cheese, then pour 1/3 cream mix.Repeat twice. Cover with foil and bake 40 min. Remove foil and bake 20 min or til bubbly and hot.

Cut into squares and serve. Sprinkle on chopped parsley if you’d like!
(Note: To speed along the process a bit, you may boil sliced potatoes for 3 to 5 minutes before assembling the casserole. Just drain and slightly cool before assembling.)

Thursday, July 5, 2012

Thankful Thurs #27

1. The basketball hoop that fell over in a thunderstorm missed Mrblocko's car by less than an inch.

2. We set the basketball hoop at the side of the road and it was gone in less than an hour.

3. A nice visit with my mom.

4. It's been months between my last digestive problem.

5. Both Blockette and I survived her day of a horrible attitude.

6.  Even though I forgot an entire cup of flour in the cookies, they still tasted delicious.  Buttery, but delicious. (Just another reason to never attempt to bake when it's 100F out.  The brain gets all melt-y, kinda like these cookies!)

7. When Boo ate part of one of the above mentioned cookies, he did not get sick.

8. Air Conditioning.

9. Not having to leave the house for anything in this heat.

Wednesday, July 4, 2012

Lazy Bars

There's nothing wrong with being lazy. Particularly when it is hot outside and you want a baked dessert but don't want to spend a lot of time heating up the house with the oven.

And there is also nothing wrong with being so lazy that you don't want to spend a lot of time in the kitchen preparing said dessert. When it's hot out, I don't really want to move to change the channel on the TV let alone mix up a bunch of junk to make something to eat.
This is why lazy cake cookies from I'm a Lazy Mom, is so totally awesome. You will need:
Cake mix (I used Duncan Hines French Vanilla cause that's what I had)
5T butter
2 Eggs
a bag of chips or m and m's to equal about 2 cups

First, preheat your oven to 350F.
Melt the butter.  (I like to do this in my largest microwaveable bowl so I only have 1 thing to clean.)
Dump in the cake mix and eggs.  Once all that is combined, stir in your chocolate pieces.

(Wouldn't it be more seasonally appropriate if I had red, white and blue M and M's?  Sure, but this was what I found hidden in the back of my pantry.  Easter M and M's.  Work with me here people.)

Spray or grease a 9x13 pan.  Dump the batter in the pan and smoosh it all around.  (I did this with a spatula I sprayed with cooking spray to save my sanity.  The dough is really sticky.) 

The dough is going to look like it isn't going to be enough to cover the bottom of the pan.  It's ok to spread it out thin.  Resist the urge to put it in a 9x9 or 8x8 pan.  This will drastically increase your cooking time, and that will defeat the purpose.  Remember it's not cake, its a bar.  Besides, it will rise in the oven.

Bake for 20-25 min.  We let ours cool completely before eating, but I bet it would be awesome warm out of the pan with a big scoop of ice cream too!

Tuesday, July 3, 2012

June Cross Stitches

I completed four small projects this month. Not too shabby considering all the books I read as well.

The design below didn't photograph well.  It's actually done on Navy Aida with this funky fluorescent yellow.  I wanted to do it in glow in the dark thread, but they didn't have any at the craft store by me. 
The Crafty Companion: Lumos

I actually started this cross stitch over a year ago.  It was my travel project for the plane when we went to Disney World last spring.    For some reason poor Tink was abandoned, only half finished.  This came as part of a kit.  I didn't like the stiff Aida that it came with, so I switched it to an evenweave with a higher count.  The design is stitched over two threads.
Janlynn: Tinkerbell Giggle Sketch
The next two designs I bought back when Blockette was just a baby.  They are both stitched with hand dyed threads.  I had to change a few of the colors, as I didn't have all the suggested ones in my stitching stash.
Bent Creek: Spooky Row
I wound up outlining the skeleton because I felt he didn't stand out enough against the light colored linen fabric.

I'm pretty bummed out that the cat between the "e" and "f" doesn't show up well.  I might outline that one as well.
Bent Creek: Kitty Row
I particularly like this design as the two cats sitting together remind me of my own crazy kitties.

As usual, I have no idea/plans for any of these cross stitches.  I just did them for fun! 

Monday, July 2, 2012

June Reads

1. Unholy Night by Seth Grahame-Smith.
This was a story based on the Three Wise Men and their encounters with Jesus, Mary and Joseph.  The book was written by the same author who wrote Pride, and Prejudice and Zombies, and Abraham Lincoln, Vampire Slayer, so I thought there was going to be quite a bit of irreverence.  Surprisingly, this was not the case.  All I know about the Three Wise Men is the stuff that is written in the New Testament, which isn't a lot, so I have no idea if the story is remotely accurate.  I do know that it was a thoroughly enjoyable and, at least to me, believable read.  The only part I didn't like was at the end when the only remaining "wise man," after all he had seen with his own two eyes, still didn't believe that Jesus was the Messiah.  Other than that, a great read.

2. Timeless by Gail Carriger
This book, not so much of a great read.  I actually had to put this book down and walk away from it for a while, and I read Unholy Night as a break from the storyline.  Timeless, is the 5th and final book in the Parasol Protectorate series.  And to that I say good riddance to bad rubbish.  With each book in the series, I liked the storyline less and less.  I don't get it, Romance, vampires, werewolves, Victorian Steampunk England...what's there not to love.  Apparently the writing and the storyline.  They both just dragged on and on.  Like wading through thick mud, the book was heavy and laborious and a total relief when I was finished.  I really wanted to like this series, but now that it is over, I would definately NOT recommend it.  If for some reason there was a book 6 I wouldn't waste my time.  Somebody else please write a better supernatural Victorian Steampunk series!

3. Janitors by Tyler Whitesides
What a surprise this book was.  The story is geared toward kids in about the 6th grade, but don't let that deter you from what is a pretty original storyline.  Granted, there was a tiny bit of Spiderwick  in the story, but not enough to be annoying.  The main character discovers that there are monster like creatures in the school and the janitors know about it, but which side are the janitors on?  Well, I thought it was pretty easy to figure that one out as it is a kids book, but the fun was seeing how the main characters found out the truth.  I look forward to the sequel, Secrets of the New Forest Academy, slated to come out this Fall.

4.The World of Downton Abbey by Jessica and Julian Fellows
This was a quick read with wonderful photographs from the TV Show.  The pictures almost made me wish I had High Def TV! The book had little snippets of background information on the characters and a few interesting quotes from the actors.  A fun read for fans of the show.

5.Death Catchers by Jennifer Anne Kogler.  This was an interesting twist on the Arthurian Legend.  In this version, it's not Guinivere who has the affair with Lancelot, but Morgan le Fay. The offspring, and all subsequent female descendents, of that union was "gifted" with the ability to predict when a loved one is going to die.  This story is set in modern California which was another interesting twist to the story.  This book was written for a target audience of teenagers, and was set up for a sequel.  The book was well written and the characters engaging enough for me to want to read a follow up book.

6. Bliss by Kathryn Littlewood.  This was a quick little juvenile read about a family of magical bakers.  The parents have to leave town and the children are left to run the bakery.  They are duped by an estranged distant relative who steals the magical cookbook.  This book is also set up for a sequel, which I would gladly read.