
This weekend we went to go visit my In-laws. I was given the charge (which I gladly accepted) to bring a "simple" dessert. I saw these Chocolate Peanut Butter Cut Outs from The Lonely Baker and just KNEW they would be perfect.
 I told Mrblocko I was going to make cut out cookies with frosting and can you believe he doubted my Cookie Fu? He had the nerve to wrinkle up his nose and say, "Um, I don't really like sugar cookies." Then I said, "Oh did I forget to mention they were PEANUT BUTTER cookies, with chocolate Fudge frosting?" He begrudgingly said, "Well, that is different than a regular Sugar cookie." Wasn't his vote of confidence completely underwhelming?
Originally, I had planned to use a can of dark chocolate fudge frosting for the sandwich filling. I saw some the previous week at the store. Can you believe they were completely out?!!!! It was like someone had a dark chocolate fudge frosting party. I took a risk and went with the plain milk chocolate fudge frosting. This was definitely the way to go. I think the peanut butter needed the extra sweetness from the milk chocolate.
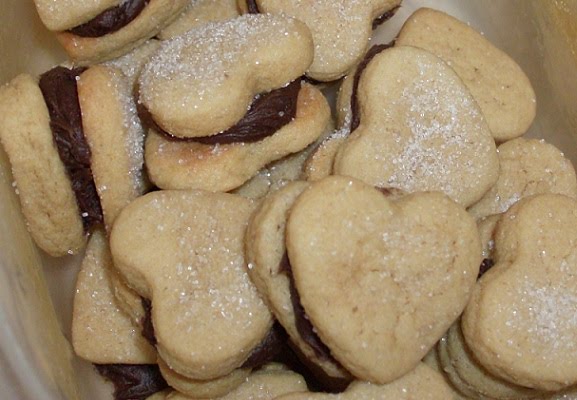
I wish that I had some pink or red colored sugar to dust on the tops. I thought I did but, alas, I was mistaken. I tried using some of those rainbow colored nonpareils, but they just rolled all over the baking sheet, and refused to stick to the dough. They looked too plain without the sugar, so ordinary boring old white sugar it was. Plus, the sugar covered up the less than smooth looking cookie surface.
These cookies are so moist. Wow! They are as soft as those Frosted Lofthouse Brand Sugar Cookies. I made these babies on Thursday, and have stored them in an unsealed container and they are STILL super soft!
Since, I made the tiny heart cut outs from the larger hearts, I debated whether or not I should bake the tiny hearts as is, or roll them out again into larger ones. I thought the mini heart sandwiches would be cute. Not only was it less work, but it proved a great way to use up every bit of the dough scraps. The little ones are so evil because they just pop right into your mouth. Before you know it, you've eaten 12 or maybe even 40.
 My mother-in-law said that I could bring these cookies to any family function I wanted too. I did remind her that I couldn't bring them to the family reunion this summer as the frosting would melt in the long car ride. With a little smirk she said, "Of course, but you could always bring them out the NEXT time you come out." I think it is safe to say that I have completely conquered my fear of cut out cookies and I'm pretty proud of that.
And what was the verdict from Mrblocko regarding these cookies? He says that the jury is still out on that one, and that I need to make several more batches for him to know one way or the other.
Chocolate Peanut Butter Sandwich Hearts from The Lonely Baker
1 cup creamy peanut butter
3/4 cup sugar
3/4 cup packed brown sugar
2 eggs
1/3 cup 2% milk
1 teaspoon vanilla extract
2-1/2 cups all-purpose flour
1/2 teaspoon baking powder
1/2 teaspoon baking soda
I added 1/2 teaspoon salt
1 tub of chocolate frosting(I used chocolate fudge)
In a large bowl, cream peanut butter and sugars until light and fluffy, about 4 minutes. Beat in the eggs, milk and vanilla. Combine the flour, baking powder and baking soda; add to creamed mixture and mix well. Cover and refrigerate for 2 hours or until easy to handle. On a lightly floured surface, roll out dough to 1/4-in. thickness. Cut with 2-in. to 4-in. cookie cutters. Place 2 in. apart in ungreased baking sheets. Bake at 375° for 7-9 minutes or until edges are browned. Cool for 1 minute before removing from pans to wire racks to cool completely. I used a big heart cutter for the bottom layer and a big heart and a smaller heart cutter to make the top layer. I sprinkled the top layer with a little bit of white sugar before baking. For best results bake the top layer and bottom layer separately. The top layer bakes much faster. I baked the top layer for 5 minutes and the bottom layer for 7 minutes.
Once cooled, assemble the cookies by spreading a thin layer of frosting between the two layers.
Yay! I'm glad you liked them!
ReplyDeleteAmber(The Lonely Baker)
These look delicious! If you really, really, really want to bring them to the family function you could pack them in a cooler for the ride.
ReplyDeleteIf you need a break stop by for some of my dessert, it's decadent!
I've enjoyed my visit today!
Mary